Author

Aleena

Browsing

When I first tried Cinnamon Swirl Coffee Cake in a small bakery in Brooklyn, it changed my idea of what a “morning cake” could be. That bakery window was fogged, the air alive with cinnamon and vanilla, and a slice of thick cake with a ribbon of brown sugar running through it made the day feel special. Since then, I’ve worked on a version that hits all the notes: moist, tender, with a clear swirl and a crumb topping that isn’t just decorative but essential.

Thanks for being here. I hope these recipes bring warmth to your kitchen and a little joy to your day.

Table of Contents
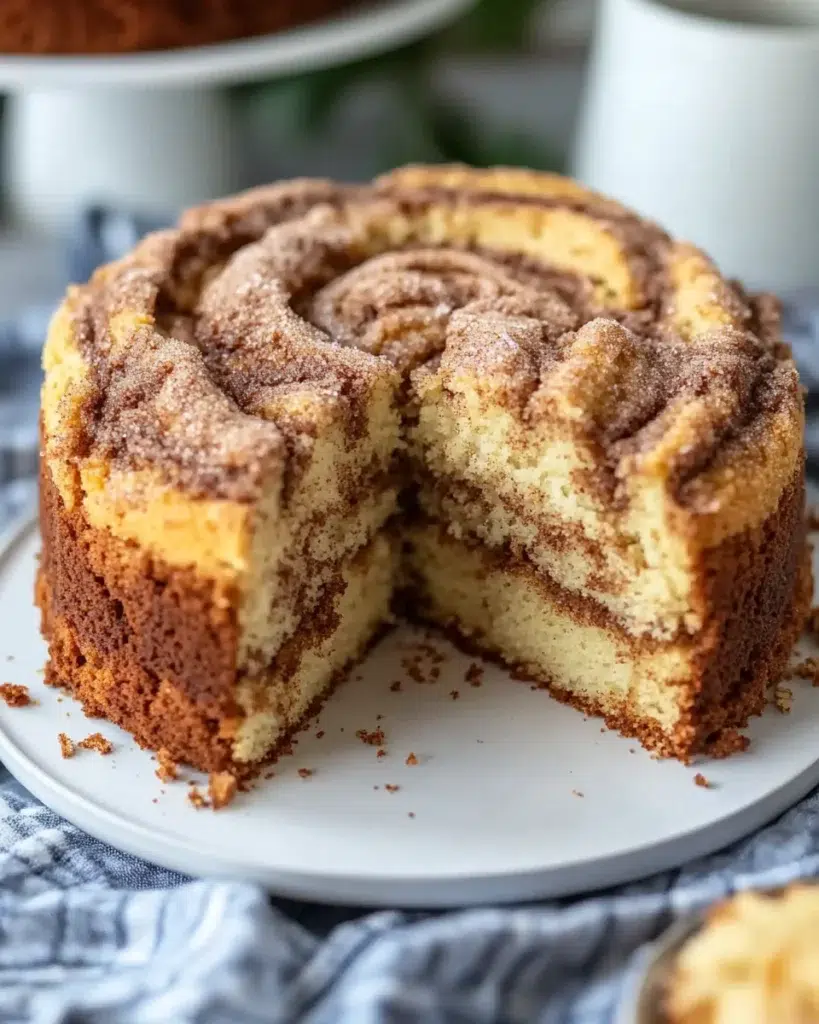
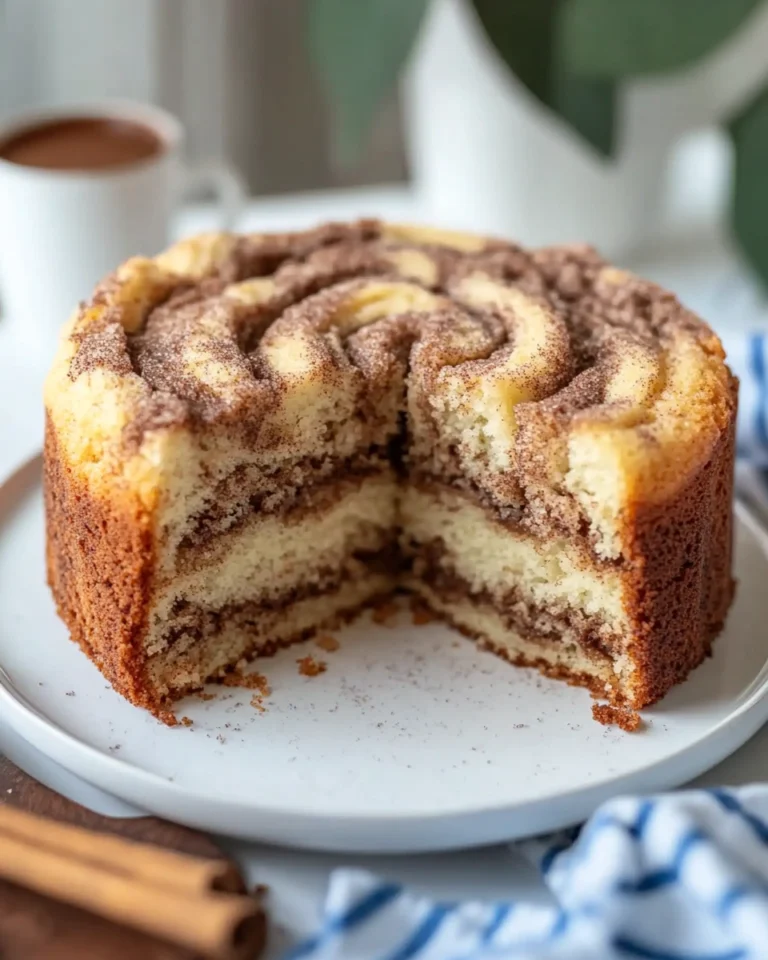
Cinnamon Swirl Coffee Cake with buttery streusel topping on a rustic wooden table
A warm slice of cinnamon swirl coffee cake, perfect with morning coffee.


Why Cinnamon Swirl Coffee Cake Is a Timeless Favorite

A coffee cake isn’t about coffee—it’s about a cake you enjoy with coffee. Classic versions have lifted, tender crumbs and less sugar than dessert cakes. The cinnamon swirl adds that comforting flavor layer without overpowering the base. Many modern versions also include a crunchy streusel topping or crumb layer, which gives contrast in texture.

In U.S. brunch culture, this cake fits perfectly: it can be made ahead, sliced easily, and pairs beautifully with tea, coffee, or fresh fruit.

Ingredients You’ll Need (no table)

  • All-purpose flour, about 2¼ cups
  • Baking powder, 2 tsp
  • Salt, ½ tsp
  • Granulated sugar, ¾ cup
  • Light brown sugar, ½ cup, packed
  • Unsalted butter, softened, about ½ cup + extra for swirl
  • Eggs, 2 large
  • Milk or buttermilk, 1 cup
  • Vanilla extract, 1½ tsp
  • For the cinnamon swirl: cinnamon, 2–3 tbsp; brown sugar, ¼ to ⅓ cup; a bit of melted butter
  • For crumb topping (optional but recommended): flour, brown sugar, butter, a dash of cinnamon

You can vary some items: use part oil with butter for extra moistness, or substitute half the milk with sour cream for a richer crumb.

If you love baking classics, you might also enjoy other hits in our Dessert Recipes Collection.

How to Bake the Perfect Cinnamon Swirl Coffee Cake
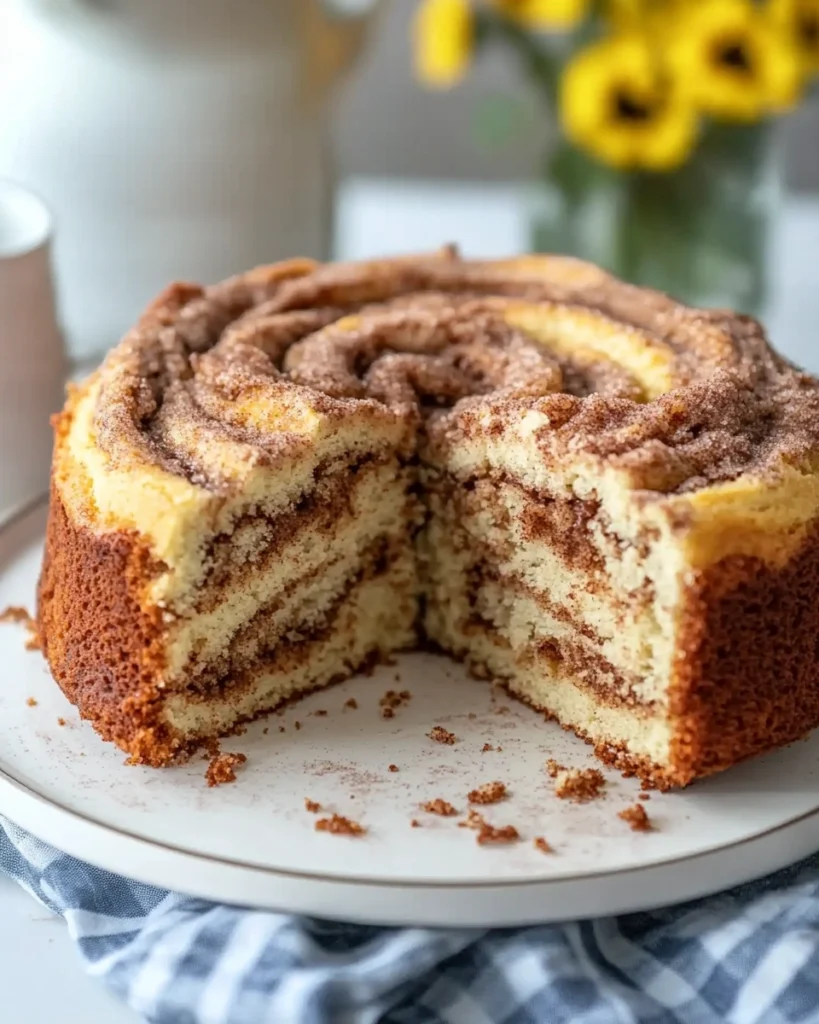
Cinnamon Swirl Coffee Cake with buttery streusel topping on a rustic wooden table
A warm slice of cinnamon swirl coffee cake, perfect with morning coffee.

1. Prep & combine dry ingredients

Preheat the oven to 350°F (175°C). Grease or line a 9×9 or 8×8 pan. In a bowl, whisk together flour, baking powder, and salt.

2. Cream butter and sugars

In a mixer, beat the softened butter with granulated and brown sugar until light and fluffy. This aerates the batter and helps the texture.

3. Add eggs, vanilla & milk

Mix eggs one at a time, then stir in vanilla. Alternate adding dry ingredients and milk (or buttermilk) until just combined. Don’t overmix.

4. Prepare the cinnamon swirl

In a small bowl, combine brown sugar, cinnamon, and a bit of melted butter to make a paste.

5. Layer and swirl

Pour half the batter into the pan, then spoon the cinnamon mixture over it. Top with the remaining batter. Use a knife or skewer to gently swirl the cinnamon layer into the batter, creating a ribbon effect.

6. Add crumb topping (if using)

If you like a crumb topping, mix flour, brown sugar, cold cubed butter, and a pinch of cinnamon until coarse crumbs form. Sprinkle over the top.

7. Bake

Bake for about 40–50 minutes (time depends on pan size) until a toothpick inserted in the center comes out clean or with a few moist crumbs.

8. Cool & serve

Allow to cool in the pan for 10–15 minutes, then serve slices warm or at room temp.

Tips & Variations

  • Don’t over-swirl — you want a visible cinnamon ribbon, not full mixing.
  • Use sour cream or yogurt for part of the milk to keep the cake moist.
  • Double the crumb so you have topping and swirl in one mix. (A technique used by Sally’s Baking Addiction)
  • Glaze option — mix powdered sugar + milk + vanilla, drizzle over cooled cake.
  • Pan size matters — a 9×9 will be deeper, 8×8 makes it thicker (bake slightly longer).

If you love baking classics, you might also enjoy other hits in our holidays Recipes Collection.

Nutrition & Quick Snapshot
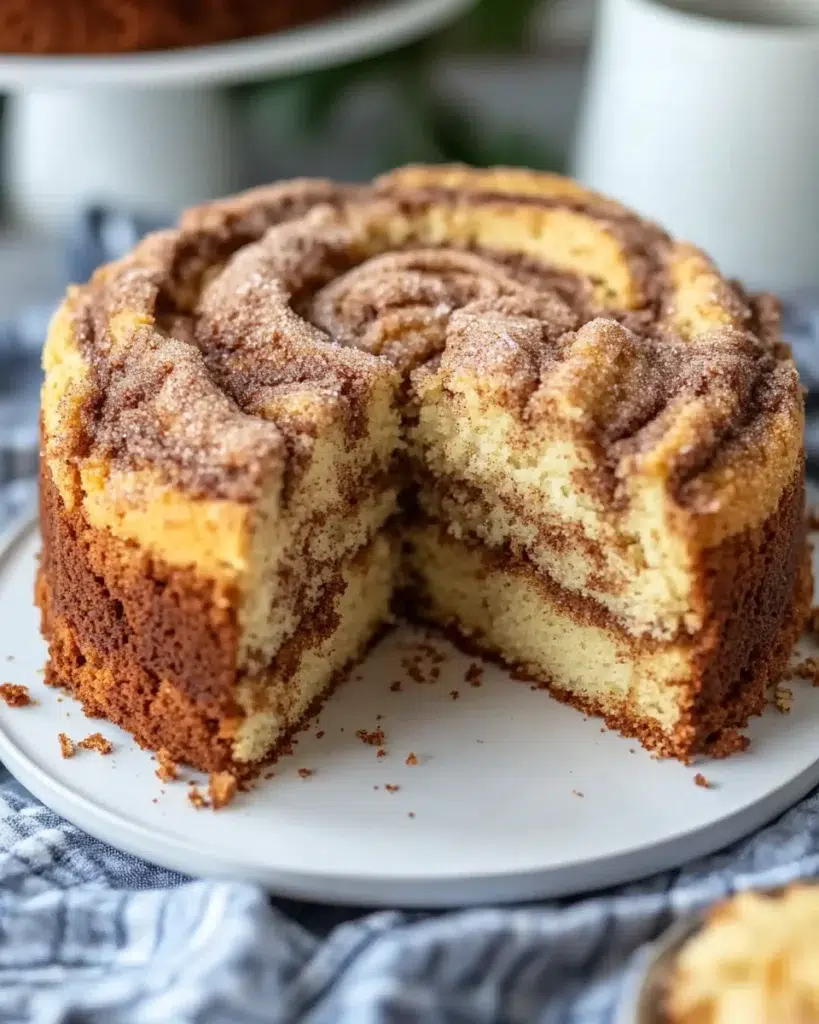
Cinnamon Swirl Coffee Cake with buttery streusel topping on a rustic wooden table
A warm slice of cinnamon swirl coffee cake, perfect with morning coffee.

Here’s an approximate nutrition profile per slice (if you cut into 12 pieces):

  • Calories: ~ 320 kcal
  • Protein: ~ 5 g
  • Carbs: ~ 42 g
  • Fat: ~ 13 g
  • Fiber: ~ 1 g
  • Sugar: ~ 22 g

Keep in mind, additions like crumb topping or glaze will increase calories. Moderation is key.

What Goes with Cinnamon Swirl Coffee Cake?

Serve it with:

  • A strong black coffee or espresso
  • Chai or spiced latte
  • Fresh berries or citrus fruit for brightness
  • A dollop of whipped cream or Greek yogurt

It also makes a lovely brunch centerpiece — pair with quiche, frittatas, or fruit salad.

If you love baking classics, you might also enjoy other hits in our Baking Recipes Collection.

FAQs — Cinnamon Swirl Coffee Cake

Q: Does coffee cake actually have coffee in it?

No, it’s named for being a cake to be enjoyed alongside coffee, not containing coffee.

Q: How to keep the swirl from bleeding?

Chill the swirl mixture slightly and swirl gently. Also, thicker batter helps maintain separation.

Q: Can I use gluten-free flour?

Yes — choose a well-blended GF baking flour (1:1) and reduce mixing. Texture may differ slightly.

Q: How do I store leftovers?

Store in an airtight container for 2–3 days. It also freezes well — wrap slices in foil & freeze up to 1 month.

Conclusion

Cinnamon Swirl Coffee Cake is more than a bake — it’s comfort, tradition, and a little piece of bakery luxury in your own kitchen. Whether it’s for Sunday brunch, a cozy afternoon, or holiday gatherings, its moist crumb, buttery flavor, and warm cinnamon swirl make it a crowd-pleaser.

If you love baking classics, you might also enjoy other hits in our breakfast Recipes Collection.

Print

clock clock iconcutlery cutlery iconflag flag iconfolder folder iconinstagram instagram iconpinterest pinterest iconfacebook facebook iconprint print iconsquares squares iconheart heart iconheart solid heart solid icon
Cinnamon Swirl Coffee Cake with buttery streusel topping on a rustic wooden table

Cinnamon Swirl Coffee Cake — A Cozy Brunch Classic


5 Stars 4 Stars 3 Stars 2 Stars 1 Star

No reviews

  • Author: Aleena
  • Total Time: 1 hr 15 mins
  • Yield: 12 slices 1x

Description

This Cinnamon Swirl Coffee Cake is buttery, tender, and layered with a rich cinnamon-sugar swirl topped with a crumbly streusel. Perfect for cozy mornings, family gatherings, or holiday brunches, this cake pairs beautifully with coffee or tea.


Ingredients

Scale
  • 2 cups all-purpose flour
  • 1 cup granulated sugar
  • 1/2 cup unsalted butter, softened
  • 2 large eggs
  • 1 cup sour cream
  • 1 tsp baking soda
  • 1 tsp baking powder
  • 1/4 tsp salt
  • 2 tsp vanilla extract
  • Cinnamon Swirl Filling:
  • 1/2 cup brown sugar
  • 2 tbsp ground cinnamon
  • Streusel Topping:
  • 1/2 cup all-purpose flour
  • 1/2 cup brown sugar
  • 1/4 cup cold unsalted butter, cubed
  • 1 tsp cinnamon

Instructions

  1. Preheat oven to 350°F (175°C). Grease and flour a 9×13-inch pan.
  2. In a bowl, cream together butter and sugar until fluffy.
  3. Add eggs and vanilla, beating until combined.
  4. Mix in sour cream. In another bowl, whisk flour, baking soda, baking powder, and salt.
  5. Gradually add dry ingredients into wet mixture until smooth.
  6. Pour half the batter into the pan, sprinkle the cinnamon swirl filling evenly, and top with the remaining batter.
  7. Mix streusel topping with a fork until crumbly and sprinkle over the batter.
  8. Bake for 35–40 minutes, or until a toothpick comes out clean.
  9. Cool for 15 minutes before slicing.

Notes

For a holiday touch, drizzle with vanilla glaze.
Can be baked in a bundt pan for a more festive presentation.
Keeps well for 3–4 days in an airtight container.

  • Prep Time: 20 minutes
  • Cook Time: 40 mins Cooling Time: 15 mins
  • Category: dessert
  • Method: Frying
  • Cuisine: American

Nutrition

  • Calories: 285
  • Sugar: 26 g
  • Fat: 12g
  • Carbohydrates: 42g
  • Fiber: 4 g
  • Protein: 4g
Introduction

When I first moved to New York, I was always on the hunt for meals that were affordable, filling, and easy enough to make in a tiny apartment kitchen. That’s when a friend introduced me to the Bang Bang Chicken Bowl. The first bite was unforgettable—crispy chicken, fresh veggies, fluffy rice, and that creamy-sweet-spicy bang bang sauce tying everything together.

It instantly became one of my favorite comfort foods after a long day. The best part? It’s foolproof. Even if you’re new to cooking, this dish delivers huge flavor with minimal effort.

Thanks for being here. I hope these recipes bring warmth to your kitchen and a little joy to your day.

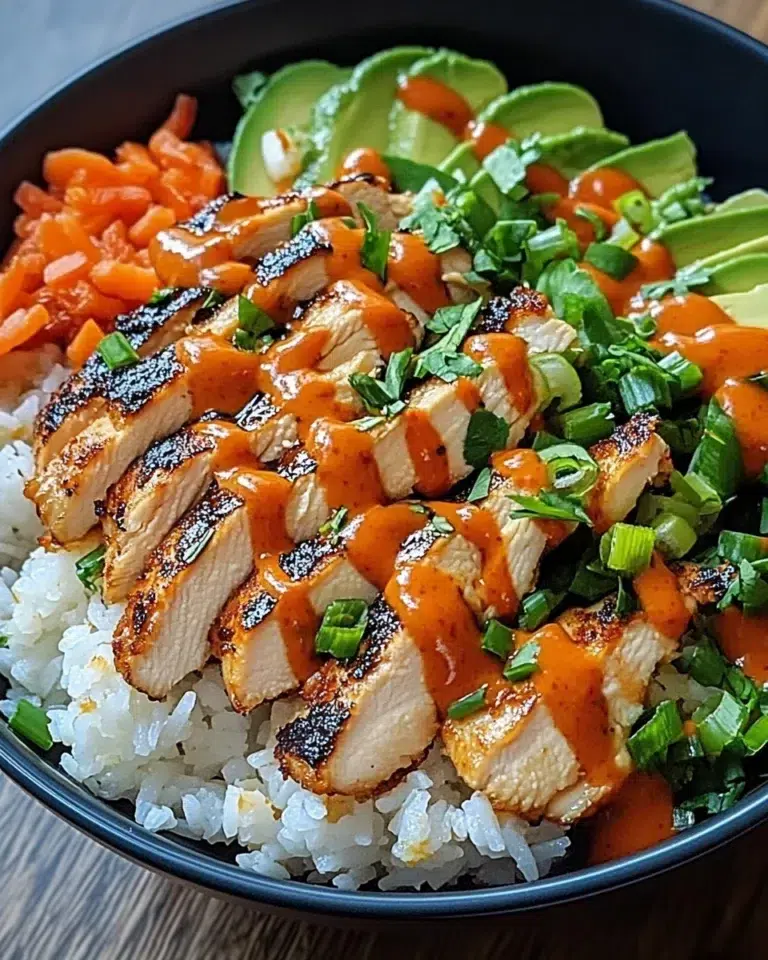
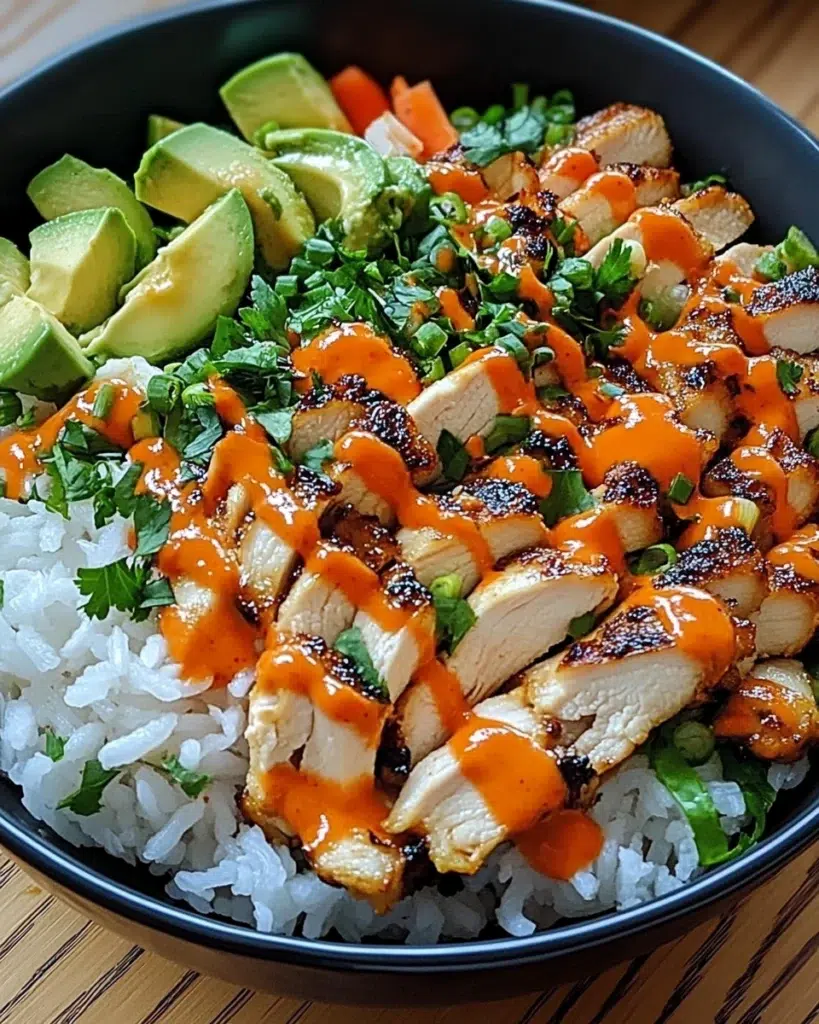
Bang Bang Chicken Bowl with tender chicken, crisp cabbage, cucumber, avocado, and creamy sauce in a white ceramic bowl.
A vibrant Bang Bang Chicken Bowl topped with creamy sauce and fresh veggies.

What Is a Bang Bang Chicken Bowl?

The Bang Bang Chicken Bowl is a modern comfort dish built around bold flavor and fresh ingredients. The hero is its sauce: a simple blend of mayonnaise, Thai sweet chili sauce, and sriracha that creates a balance of creamy, sweet, and spicy.

It’s perfect for beginner cooks because there’s no tricky technique involved. You just pan-sear chicken until golden, whisk the sauce in under five minutes, and assemble the bowl. That’s it—fast, affordable, and unbelievably tasty.

Key Ingredients for a Perfect Bowl

Choosing the Right Chicken

Both chicken breast and thighs work well. Breasts are leaner and cook faster, while thighs stay juicy and forgiving. If you’re meal prepping, thighs are often the best option since they reheat better.

The Base: Rice and Veggies

Most versions use jasmine or basmati rice, but you can substitute brown rice, quinoa, or even cauliflower rice. Veggies add crunch and freshness—try shredded carrots, cucumbers, cabbage, or bell peppers.

The Bang Bang Sauce

Here’s a classic recipe for the sauce:

  • ½ cup mayonnaise
  • 2 tablespoons Thai sweet chili sauce
  • 1 tablespoon sriracha (adjust to taste)
  • 1 teaspoon honey (optional, for balance)

Whisk until smooth and creamy.

check out more easy chicken dishes on CHICKEN DINNER IDEAS to keep your weeknight cooking exciting and stress-free.

Step-by-Step Guide to Making Bang Bang Chicken Bowl

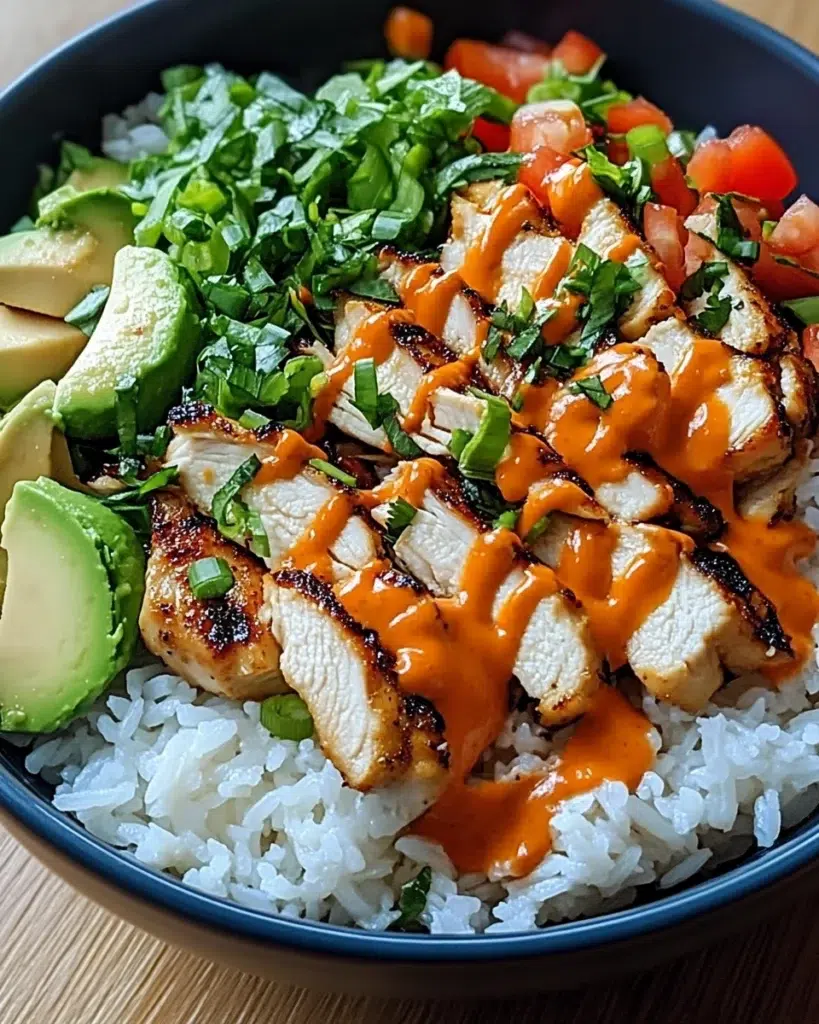
Bang Bang Chicken Bowl with tender chicken, crisp cabbage, cucumber, avocado, and creamy sauce in a white ceramic bowl.
Close-up shot of Bang Bang Chicken Bowl featuring golden chicken, crisp vegetables, and a drizzle of spicy-sweet sauce, served in a modern white bowl, styled for food blogging.

Preparing the Chicken

  1. Cut chicken into bite-sized pieces.
  2. Season with salt, pepper, and garlic powder.
  3. Cook in a skillet with oil for 6–8 minutes until golden and cooked through.

Making the Sauce

  1. Mix mayo, sweet chili sauce, and sriracha in a bowl.
  2. Adjust seasoning to your liking.

Building the Bowl

  1. Add a base of rice to your bowl.
  2. Top with cooked chicken.
  3. Drizzle generously with bang bang sauce.
  4. Add fresh veggies and garnish with sesame seeds, cilantro, or green onions.

Why This Recipe Is Beginner-Friendly

Cooking doesn’t need to be intimidating. The Bang Bang Chicken Bowl requires just three steps: cook, mix, and assemble. With minimal prep, you get a balanced meal full of texture and bold flavors.

It’s also flexible. Swap chicken for shrimp, tofu, or even crispy chickpeas. Use whatever rice or vegetables you have on hand. It’s a recipe that bends to fit your pantry and your taste.

check out more easy chicken dishes on HEALTHY WEEKNIETH MEAL to keep your weeknight cooking exciting and stress-free.

Nutrition and Health Benefits

Here’s a quick breakdown of what one serving (1 bowl) typically provides:

NutrientAmount
Calories~520 kcal
Protein32g
Carbs45g
Fat21g
Fiber4g

Why It’s Balanced

The chicken adds lean protein, rice provides satisfying carbs, and veggies contribute fiber and vitamins. The sauce adds richness, but with easy swaps—like Greek yogurt instead of mayo—you can make it even lighter.

Healthier Substitutes

  • Swap white rice for quinoa or brown rice for extra fiber.
  • Replace mayo with Greek yogurt for more protein.
  • Add leafy greens like spinach for a nutrient boost.

Tips, Tricks, and Variations

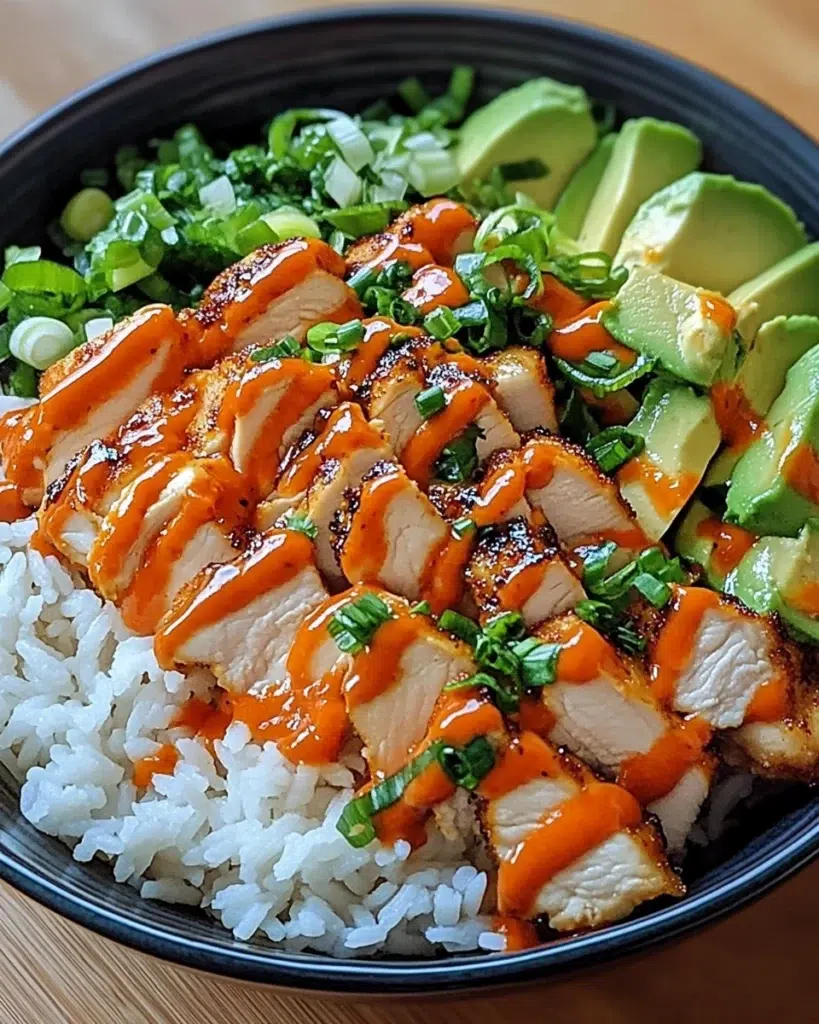
Bang Bang Chicken Bowl with tender chicken, crisp cabbage, cucumber, avocado, and creamy sauce in a white ceramic bowl.
Close-up shot of Bang Bang Chicken Bowl featuring golden chicken, crisp vegetables, and a drizzle of spicy-sweet sauce, served in a modern white bowl, styled for food blogging.
  • Adjust the spice: More sriracha for heat, more honey for sweetness.
  • Gluten-free option: Use tamari instead of soy sauce if marinating.
  • Low-carb option: Serve over cauliflower rice.
  • Meal prep tip: Store chicken and sauce separately. Assemble fresh bowls for best texture.

Serving Ideas

This bowl is filling on its own, but it pairs well with:

  • Steamed dumplings
  • A light miso soup
  • Sparkling water with lime

For extra flair, garnish with sesame seeds, chopped peanuts, or avocado slices.

check out more easy chicken dishes on CHICKEN MEATLOAF IDEAS to keep your weeknight cooking exciting and stress-free.

Frequently Asked Questions

What does bang bang sauce taste like?

It’s creamy, sweet, spicy, and tangy all at once—a true flavor explosion.

Can I make this ahead of time?

Yes, just store the chicken, sauce, and rice separately, then assemble when ready to eat.

Is it good for weight loss?

Absolutely, especially if you use lighter swaps like Greek yogurt and cauliflower rice.

What’s the best rice for this bowl?

Jasmine rice for fragrance, but quinoa or brown rice for extra nutrition.

Can it be vegetarian?

Yes—crispy tofu or roasted chickpeas are great alternatives to chicken.

Conclusion

The Bang Bang Chicken Bowl proves that beginner-friendly recipes can still deliver restaurant-quality flavor. With just a skillet, a whisk, and a few simple ingredients, you can create a dish that’s bold, customizable, and always satisfying.

If you enjoyed this recipe, check out more easy chicken dishes on GridRecipes to keep your weeknight cooking exciting and stress-free.

Print
clock clock iconcutlery cutlery iconflag flag iconfolder folder iconinstagram instagram iconpinterest pinterest iconfacebook facebook iconprint print iconsquares squares iconheart heart iconheart solid heart solid icon
Bang Bang Chicken Bowl with tender chicken, crisp cabbage, cucumber, avocado, and creamy sauce in a white ceramic bowl.

Bang Bang Chicken Bowl: A Flavor Explosion for Beginner Cooks


5 Stars 4 Stars 3 Stars 2 Stars 1 Star

No reviews

  • Author: Aleena

Description

When I first moved to New York, I was always on the hunt for meals that were affordable, filling, and easy enough to make in a tiny apartment kitchen. That’s when a friend introduced me to the Bang Bang Chicken Bowl. The first bite was unforgettable—crispy chicken, fresh veggies, fluffy rice, and that creamy-sweet-spicy bang bang sauce tying everything together.


Ingredients

Scale
  • 1 ½ lbs boneless, skinless chicken breast or thighs
  • 2 tablespoons olive oil
  • 1 teaspoon garlic powder
  • ½ teaspoon salt
  • ½ teaspoon black pepper
  • 3 cups cooked jasmine or basmati rice
  • 1 cup shredded carrots
  • 1 cup shredded red cabbage
  • 1 cucumber, sliced thin
  • 2 green onions, chopped
  • 1 tablespoon sesame seeds (optional garnish)
  • For the Bang Bang Sauce:
  • ½ cup mayonnaise (or Greek yogurt for lighter option)
  • 2 tablespoons Thai sweet chili sauce
  • 1 tablespoon sriracha (adjust for heat)
  • 1 teaspoon honey (optional)

Instructions

  1. Cut chicken into bite-sized pieces. Season with garlic powder, salt, and pepper.
  2. Heat olive oil in a skillet over medium heat. Cook chicken 6–8 minutes until golden and fully cooked.
  3. In a small bowl, whisk together mayonnaise, sweet chili sauce, sriracha, and honey until smooth.
  4. Assemble bowls: add rice as the base, top with chicken and veggies.
  5. Drizzle generously with bang bang sauce and garnish with green onions and sesame seeds.

Notes

For meal prep: store chicken, rice, and sauce separately.
Swap mayo for Greek yogurt to reduce fat and boost protein.
Try shrimp, tofu, or chickpeas for fun variations.

Nutrition

  • Calories: 520 kcal
  • Fat: 21 g
  • Carbohydrates: 45 g
  • Fiber: 4 g
  • Protein: 32 g

A New York Holiday Baking Memory

When I first baked these cookies in a small Upper East Side apartment, the oven barely fit a single sheet pan. Yet, even in that tiny space, the smell of peppermint and chocolate filled the room and made it feel like the Rockefeller tree was right outside my window. That’s the magic of these cookies: they make even the smallest spaces feel festive.

Why Chocolate and Peppermint Are the Perfect Pair

The pairing works because peppermint cuts through the richness of chocolate, making each bite refreshing instead of heavy. According to Healthline, peppermint also supports digestion, so you can indulge a little more guilt-free.

Table of Contents
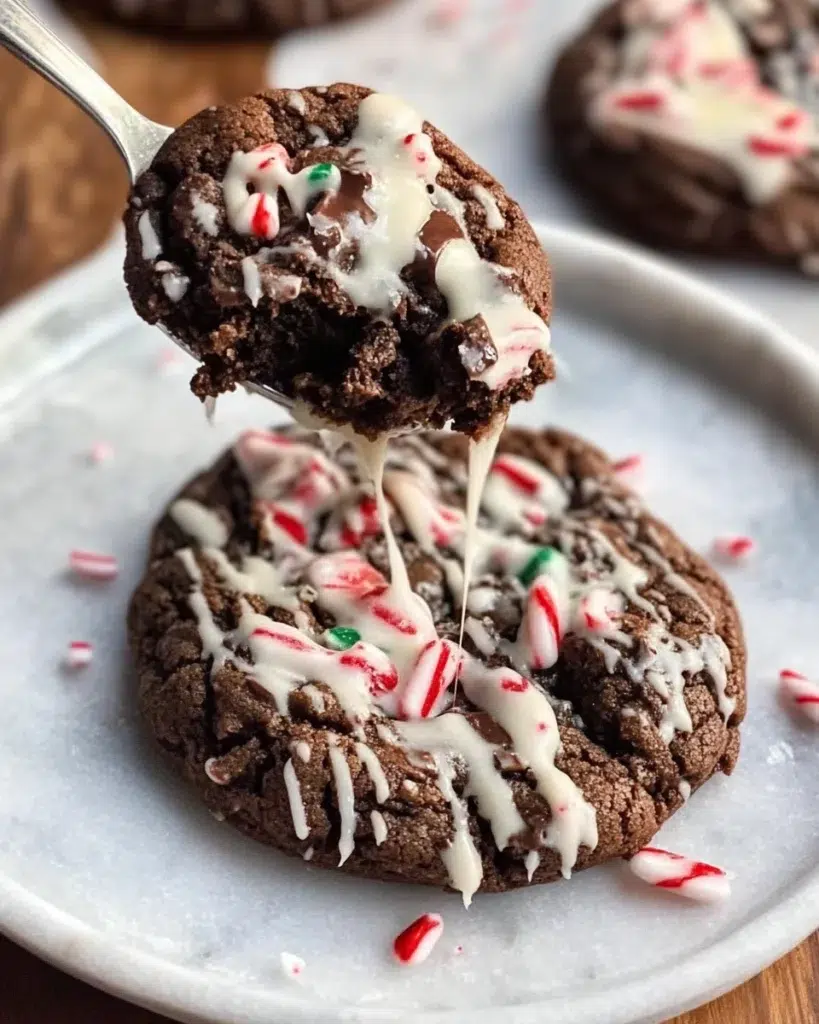
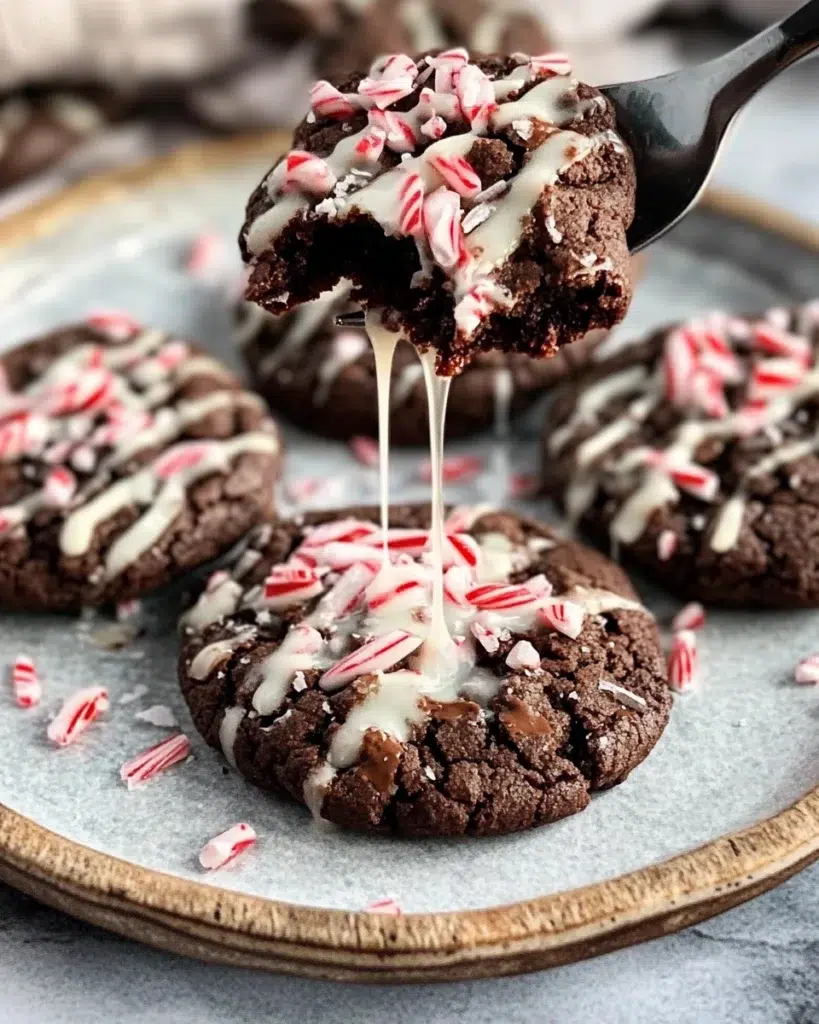
Cozy Christmas table scene with a stack of festive chocolate peppermint cookies on a white plate, candy canes scattered, soft holiday lights in the background.
Chewy chocolate cookies with peppermint crunch – the perfect holiday treat.


📝 Ingredients You’ll Need for Festive Chocolate Peppermint Cookies

Core Baking Essentials

IngredientQuantityPurpose
All-purpose flour2 ¼ cupsBase structure
Unsweetened cocoa powder¾ cupRich chocolate flavor
Baking soda1 tspLeavening
Salt½ tspBalances sweetness
Unsalted butter1 cupSoft texture
Brown sugar1 cupMoisture & depth
Granulated sugar½ cupCrisp edges
Eggs2 largeBinding & structure
Vanilla extract2 tspFlavor depth

Peppermint Additions That Elevate Flavor

  • Crushed candy canes (½ cup)
  • Peppermint extract (½ tsp – strong, use sparingly)
  • White chocolate chips (1 cup) for contrast

👩‍🍳 Step-by-Step Guide to Baking Festive Chocolate Peppermint Cookies

Preparing Your Dough the Right Way

  1. Whisk flour, cocoa, baking soda, and salt.
  2. Beat butter, brown sugar, and granulated sugar until creamy.
  3. Add eggs one at a time, then vanilla and peppermint extract.
  4. Gradually mix dry ingredients into wet.
  5. Fold in white chocolate chips and crushed candy canes.

Baking and Cooling Tips for Perfect Texture

  • Chill dough for at least 30 minutes to prevent spreading.
  • Bake at 350°F for 10–12 minutes until edges are set.
  • Let cookies rest on the sheet pan before moving to a rack — this locks in chewiness.

🎄 Decorating and Storing Festive Chocolate Peppermint Cookies

Holiday-Themed Decorations

Dip half the cookie in melted white chocolate and sprinkle with extra crushed candy canes. For a classy look, drizzle dark chocolate diagonally.

Storing Cookies to Stay Fresh

  • Room Temp: Store in airtight containers up to 5 days.
  • Freezer: Freeze unbaked dough balls for up to 3 months.

🎁 Festive Chocolate Peppermint Cookies for Gifting and Gatherings

Cozy Christmas table scene with a stack of festive chocolate peppermint cookies on a white plate, candy canes scattered, soft holiday lights in the background.
Chewy chocolate cookies with peppermint crunch – the perfect holiday treat.

Packaging Ideas for the Holidays

Place cookies in kraft boxes lined with parchment and tie with red ribbon. Mason jars also make charming DIY gifts.

Serving Suggestions at Parties

Serve with hot cocoa, mulled wine, or even peppermint lattes. These cookies pair beautifully with warm holiday drinks.

🥗 Nutrition Breakdown of Festive Chocolate Peppermint Cookies

NutrientAmount
Calories180 kcal
Carbs24 g
Protein2 g
Fat9 g
Fiber2 g

Making Healthier Substitutions

Swap butter for coconut oil, sugar for coconut sugar, or try almond flour for gluten-free. Serious Eats notes fat types directly affect texture — coconut oil adds chewiness.

🍫 Expert Tips and Variations for Festive Chocolate Peppermint Cookies

Cozy Christmas table scene with a stack of festive chocolate peppermint cookies on a white plate, candy canes scattered, soft holiday lights in the background.
Chewy chocolate cookies with peppermint crunch – the perfect holiday treat.

Gluten-Free and Vegan Options

  • Use 1:1 gluten-free flour.
  • Replace eggs with flaxseed “eggs” and butter with vegan margarine.

Adding Nuts, White Chocolate, or Espresso

  • Walnuts or almonds add crunch.
  • White chocolate chunks enhance contrast.
  • Espresso powder deepens chocolate flavor without bitterness.

❓ FAQs About Festive Chocolate Peppermint Cookies

Q: Can I use peppermint oil instead of extract?

A: Yes, but use ¼ the amount since it’s stronger.

Q: Do these cookies freeze well?

A: Yes, freeze dough or baked cookies up to 3 months.

Q: Can I skip the candy canes?

A: Absolutely — they’re decorative but optional.

Q: How do I prevent cookies from becoming dry?

A: Don’t overbake; pull them out when the centers still look soft.

✅ Conclusion – Why Festive Chocolate Peppermint Cookies Belong in Your Kitchen

These festive chocolate peppermint cookies aren’t just a treat — they’re a memory maker. They carry the warmth of chocolate, the freshness of peppermint, and the spirit of the holidays in every bite. Bake them for loved ones, gift them with care, or enjoy them with a mug of cocoa by the window.

👉 For more cozy desserts and holiday favorites, check out our Breakfast Recipes Collection

Print
clock clock iconcutlery cutlery iconflag flag iconfolder folder iconinstagram instagram iconpinterest pinterest iconfacebook facebook iconprint print iconsquares squares iconheart heart iconheart solid heart solid icon
Cozy Christmas table scene with a stack of festive chocolate peppermint cookies on a white plate, candy canes scattered, soft holiday lights in the background.

The Magic of Festive Chocolate Peppermint Cookies


5 Stars 4 Stars 3 Stars 2 Stars 1 Star

No reviews

  • Author: Aleena
  • Total Time: 57 minutes
  • Yield: 36 cookies 1x

Description

These Festive Chocolate Peppermint Cookies are the perfect holiday treat — soft, chewy, and loaded with rich cocoa flavor, then topped with crushed candy canes for a refreshing peppermint crunch. Ideal for Christmas cookie swaps, holiday dessert tables, or cozy evenings with hot cocoa.


Ingredients

Scale
  • 2 cups all-purpose flour
  • 3/4 cup unsweetened cocoa powder
  • 1 teaspoon baking soda
  • 1/2 teaspoon salt
  • 1 cup (2 sticks) unsalted butter, softened
  • 1 cup granulated sugar
  • 1/2 cup packed brown sugar
  • 2 large eggs
  • 2 teaspoons pure vanilla extract
  • 1/2 teaspoon peppermint extract
  • 1 1/2 cups semi-sweet chocolate chips
  • 1 cup crushed peppermint candy canes

Instructions

  1. Prepare the dough: In a medium bowl, whisk together flour, cocoa powder, baking soda, and salt.
  2. Cream butter and sugars: In a large bowl, beat softened butter, granulated sugar, and brown sugar until light and fluffy.
  3. Add eggs and extracts: Mix in eggs, vanilla, and peppermint extract until smooth.
  4. Combine wet and dry: Slowly stir dry mixture into wet ingredients until just combined. Fold in chocolate chips.
  5. Chill: Cover dough and refrigerate for at least 30 minutes for best texture.
  6. Shape and bake: Preheat oven to 350°F (175°C). Roll dough into tablespoon-sized balls and place 2 inches apart on parchment-lined baking sheets. Bake for 10–12 minutes until set but still soft in the center.
  7. Top with peppermint: While cookies are warm, sprinkle crushed candy canes over the top and lightly press so they stick.
  8. Cool and serve: Let cookies cool completely before storing or serving.

Notes

For extra holiday flair, drizzle cooled cookies with melted white or dark chocolate.
Cookie dough freezes well for up to 2 months — perfect for prepping ahead of Christmas.
Use peppermint bark chunks instead of candy canes for more texture.

  • Prep Time: 15 minutes Chill Time: 30 minutes
  • Cook Time: 15 minutes
  • Category: breakfast
  • Cuisine: American

There’s nothing quite like sitting in a cozy New York apartment on a brisk fall evening, watching the city lights twinkle outside while a pot of chili simmers away on the stove. The aroma of garlic, onions, tomatoes, and spices filling the kitchen is almost therapeutic. That’s where the inspiration for this Ultimate Hearty Beef Chili & Rice 2025 Edition came from — a meal that combines tradition, heartiness, and a modern touch.

Unlike the chili I grew up eating, this updated version balances bold flavors with wholesome ingredients, making it both indulgent and nourishing. And when served over fluffy rice, it transforms into a complete one-bowl meal that’s perfect for family dinners, game days, or meal prep.

Thanks for being here. I hope these recipes bring warmth to your kitchen and a little joy to your day.

Table of Contents
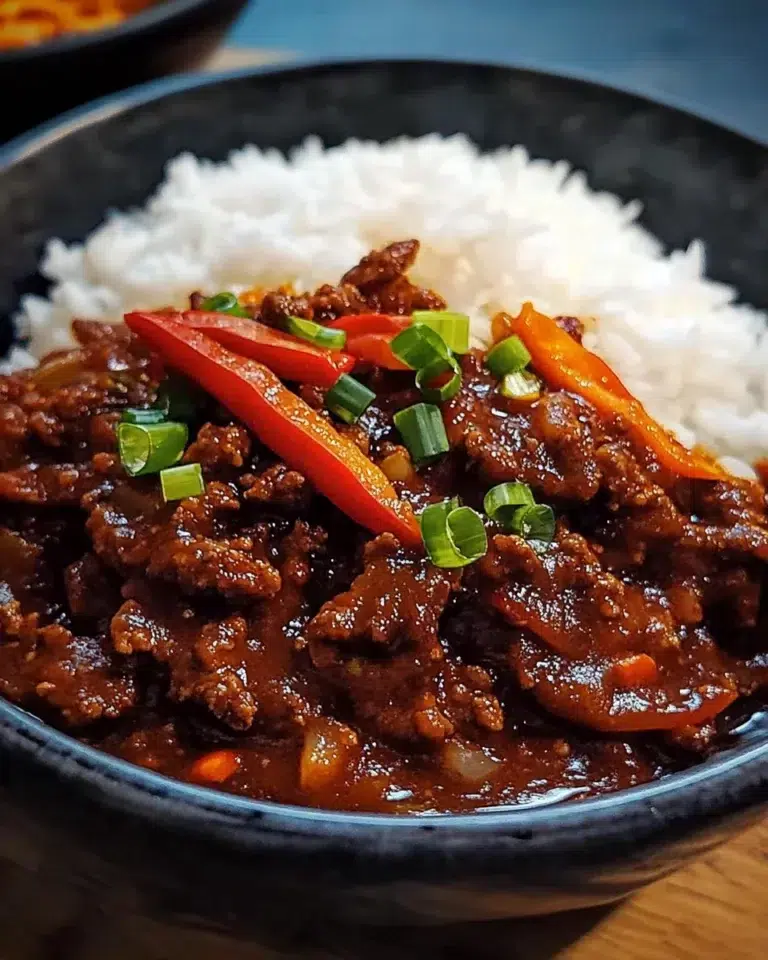
Bowl of Ultimate Hearty Beef Chili & Rice with cilantro and lime garnish

🌟 Why This Ultimate Hearty Beef Chili & Rice 2025 Edition Stands Out

A Modern Twist on Classic American Chili

Traditional chili recipes are often heavy with fat and sodium. This updated 2025 edition takes the same beloved base but enhances it with smarter ingredients — lean ground beef,

fresh vegetables, and spices that bring depth without overwhelming heat.

Why Pairing with Rice Makes It Complete

Rice turns a bowl of chili into a full, satisfying meal. It balances the boldness of the chili with a mild, fluffy texture, ensuring every bite has the perfect contrast. Plus, it stretches the dish to feed a crowd affordably.

Seasonal Comfort Food Appeal

From snowy winters to cool autumn nights, chili and rice never go out of style. In fact, they’ve become a staple in many U.S. households because they check all the boxes: comforting, budget-friendly, and family-approved.

🥩 Key Ingredients for Ultimate Hearty Beef Chili & Rice

The magic of this dish lies in its balance of flavors and textures.

Choosing the Right Beef for Chili

Opt for 85–90% lean ground beef. It has enough fat to stay juicy but not so much that the dish becomes greasy. Chuck roast, diced small, also works for a heartier bite.

The Role of Beans, Tomatoes, and Spices

  • Beans: Kidney beans and black beans add fiber and protein.
  • Tomatoes: Crushed and diced tomatoes provide acidity and depth.
  • Spices: Chili powder, cumin, smoked paprika, and a hint of cocoa powder create warmth and complexity.

Why Rice Complements Chili Perfectly

Rice absorbs the flavorful sauce and balances the chili’s richness. Jasmine or long-grain white rice works best, but brown rice can add extra nutrition.

👩‍🍳 Step-by-Step Guide to Cooking Beef Chili & Rice

Bowl of Ultimate Hearty Beef Chili & Rice with cilantro and lime garnish

Here’s how to make this recipe stress-free at home:

Prepping the Base – Onions, Garlic, and Spices

Start by sautéing onions and garlic in a heavy pot. Toasting your chili powder and cumin at this stage unlocks their oils, giving your chili a richer flavor.

Simmering the Beef to Perfection

Brown the ground beef until it’s deeply caramelized. Deglaze the pan with beef broth or red wine to lift up all those flavorful browned bits.

Adding Rice for a Wholesome Meal

While the chili simmers, cook your rice separately. When serving, scoop a bed of rice into each bowl and ladle chili over the top. Garnish with cilantro, lime, or shredded cheddar for extra comfort.

🔥 Cooking Tips & Variations for 2025 Chili Lovers

Healthier Swaps and Lean Protein Choices

  • Replace beef with ground turkey for a leaner option.
  • Try cauliflower rice if you’re cutting carbs.

Vegetarian or Vegan Chili & Rice Alternatives

Skip the beef and load up on beans, lentils, or soy crumbles. Vegetable broth and smoked paprika still provide hearty depth.

Spicy vs. Mild: Tailoring Heat Levels

Love spice? Add jalapeños or chipotle peppers. Prefer mild? Use sweet bell peppers and reduce the chili powder.

🥗 Nutrition Breakdown of Ultimate Hearty Beef Chili & Rice

Nutrient (Per Serving)Amount% Daily Value*
Calories420 kcal21%
Protein28 g56%
Carbohydrates38 g13%
Fiber8 g32%
Fat16 g24%
Sodium780 mg34%

*Percent Daily Values are based on a 2,000-calorie diet.

Is Beef Chili with Rice Healthy?

Yes — when balanced. It’s rich in protein and fiber, and when paired with brown rice, it becomes a nutrient-dense meal.

Balancing Indulgence with Nutrition

Moderation is key. Serve smaller portions with a side salad for a well-rounded dinner.

🥖 Pairings and Serving Ideas for Beef Chili & Rice

Bowl of Ultimate Hearty Beef Chili & Rice with cilantro and lime garnish

Best Sides to Serve with Chili

  • Warm cornbread
  • Simple green salad
  • Roasted sweet potatoes

Beverage Pairings – Beer, Wine, or Non-Alcoholic

  • Beer: A crisp lager balances spice.
  • Wine: Zinfandel complements chili’s boldness.
  • Non-Alcoholic: Sparkling water with lime cuts richness.

Creative Leftover Ideas

  • Chili-stuffed baked potatoes
  • Chili nachos with cheese and jalapeños
  • Chili quesadillas for a quick lunch

❓ FAQs – Everything You Need to Know About Beef Chili & Rice

What makes beef chili & rice the ultimate comfort food?

Its combination of hearty protein, warm spices, and starchy rice makes it filling and satisfying.

Can I make chili ahead of time?

Yes! In fact, chili tastes even better the next day after flavors meld together.

What type of rice works best with chili?

Long-grain white rice or jasmine rice pairs best. Brown rice is a nutritious alternative.

How to make chili less spicy without losing flavor?

Add a little honey, extra beans, or a dollop of sour cream to mellow the heat.

🥡 Storing, Freezing, and Reheating Beef Chili & Rice

How Long It Lasts in the Fridge

Chili keeps up to 4 days when stored in airtight containers.

Freezing Tips for Long-Term Storage

Freeze chili (without rice) in freezer-safe bags for up to 3 months. Rice can be frozen separately.

Best Reheating Methods for Fresh Taste

Reheat gently on the stove with a splash of broth. Microwave in short bursts to prevent drying.

✅ Conclusion – Why Beef Chili & Rice Remains America’s Favorite in 2025

The Ultimate Hearty Beef Chili & Rice 2025 Edition proves that comfort food doesn’t have to be complicated. It’s a modern take on a classic dish, blending bold flavors, wholesome nutrition, and endless versatility. Whether you’re cooking for family, friends, or meal-prepping for the week, this recipe is a timeless winner.

Get inspired with more Ideas About Stir-Fry in Dinner Recipes Collection

Print
clock clock iconcutlery cutlery iconflag flag iconfolder folder iconinstagram instagram iconpinterest pinterest iconfacebook facebook iconprint print iconsquares squares iconheart heart iconheart solid heart solid icon
Bowl of Ultimate Hearty Beef Chili & Rice with cilantro and lime garnish

Ultimate Hearty Beef Chili & Rice 2025 Edition – Comfort Food Reimagined


5 Stars 4 Stars 3 Stars 2 Stars 1 Star

No reviews

  • Author: Aleena
  • Total Time: 1 hour
  • Yield: 6 servings 1x

Description

Cozy beef chili simmered with beans, spices, and tomatoes, served with rice.


Ingredients

Scale

2 lbs lean ground beef (85–90%)

2 tbsp olive oil

1 large onion, diced

4 garlic cloves, minced

2 bell peppers, chopped

2 cans (14 oz) diced tomatoes

1 can crushed tomatoes

2 cans kidney beans, rinsed

1 can black beans, rinsed

2 tbsp chili powder

1 tsp cumin

1 tsp smoked paprika

1 tsp cocoa powder

1 cup beef broth

3 cups cooked rice (white or brown)

Salt & pepper to taste


Instructions

Heat olive oil in a large pot. Sauté onion and garlic until fragrant.

Add ground beef. Cook until browned. Drain excess fat if needed.

Stir in bell peppers, chili powder, cumin, paprika, and cocoa powder. Toast for 1 minute.

Add diced tomatoes, crushed tomatoes, beans, and broth. Stir well.

Simmer uncovered for 30 minutes, stirring occasionally.

Serve hot over rice. Garnish with cilantro, lime, or shredded cheese.

Notes

Substitute ground turkey for a leaner option.
For vegetarian chili, replace beef with lentils or soy crumbles.
Adjust spice levels to your preference.

  • Prep Time: 15 minutes
  • Cook Time: 45 minutes
  • Category: Dinner, Lunch, Snack
  • Method: Frying
  • Cuisine: Mediterranean-Inspired

Nutrition

  • Calories: 420 kcal
  • Sodium: 780 mg
  • Fat: 16 g
  • Carbohydrates: 38g
  • Fiber: 8 g
  • Protein: 28 g

I still remember the first time I had lasagna in New York City. It was a chilly winter evening, and I ducked into a cozy Italian restaurant tucked between Broadway and 9th Avenue. The scent of garlic, tomatoes, and bubbling cheese filled the air. The waiter set down a plate not of the traditional layered lasagna I grew up with, but of delicate, perfectly rolled pasta sheets stuffed with seasoned beef and ricotta, smothered in marinara, and topped with golden mozzarella.

That bite was pure comfort—hearty, cheesy, and warming in a way only lasagna can be. Ever since, Cheesy Beef Lasagna Rolls have been a family favorite in my own kitchen. They’re easier to portion than a full lasagna, bake beautifully, and are perfect for both weeknights and special gatherings.

Thanks for being here. I hope these recipes bring warmth to your kitchen and a little joy to your day.

Table of Contents
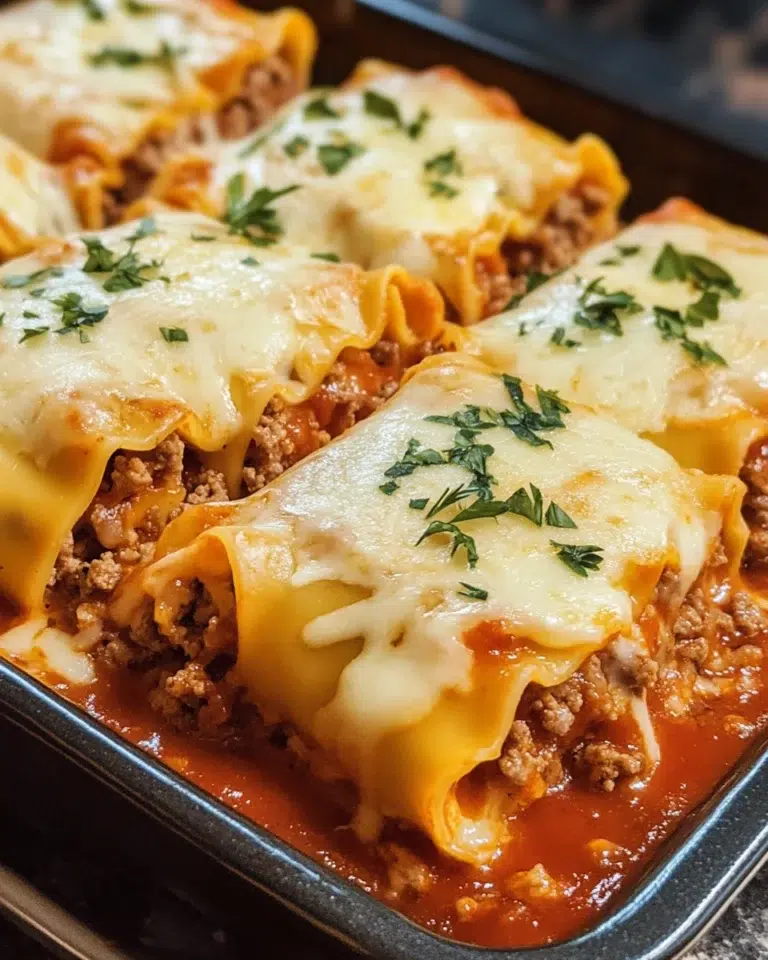
Cheesy beef lasagna rolls topped with melted mozzarella and marinara sauce.
Golden, bubbly lasagna rolls with gooey cheese and savory beef filling.

What Makes Cheesy Beef Lasagna Rolls So Special?

Flavor Profile – Cheesy, Beefy, and Irresistible

Cheesy Beef Lasagna Rolls balance savory ground beef with creamy ricotta, melty mozzarella, and tangy marinara. Each bite combines layers of richness with the fresh lift of herbs like basil and parsley.

Why Lasagna Rolls Beat Traditional Lasagna for Weeknights

While traditional lasagna is delicious, it can be a bit messy to cut and serve. Lasagna rolls, on the other hand, are neat, pre-portioned, and bake faster. They’re also freezer-friendly, making meal prep a breeze.

The Perfect Family-Friendly Meal

These rolls are customizable—kids love them plain with cheese, while adults can add spinach, mushrooms, or extra spices. It’s the type of dish that makes everyone happy around the dinner table.

Ingredients for Cheesy Beef Lasagna Rolls

Here’s what you’ll need:

IngredientMeasurementNotes
Lasagna noodles12 sheetsCooked al dente
Ground beef1 lb (450 g)Lean preferred
Ricotta cheese1 cupWhole milk for creaminess
Mozzarella cheese2 cupsShredded
Parmesan cheese½ cupFreshly grated
Egg1 largeFor binding
Marinara sauce3 cupsHomemade or store-bought
Onion1 smallFinely diced
Garlic3 clovesMinced
Olive oil2 tbspFor sautéing
Fresh parsley2 tbspChopped
Fresh basil1 tbspOptional garnish
Salt & black pepperTo taste

Step-by-Step Instructions for Cheesy Beef Lasagna Rolls

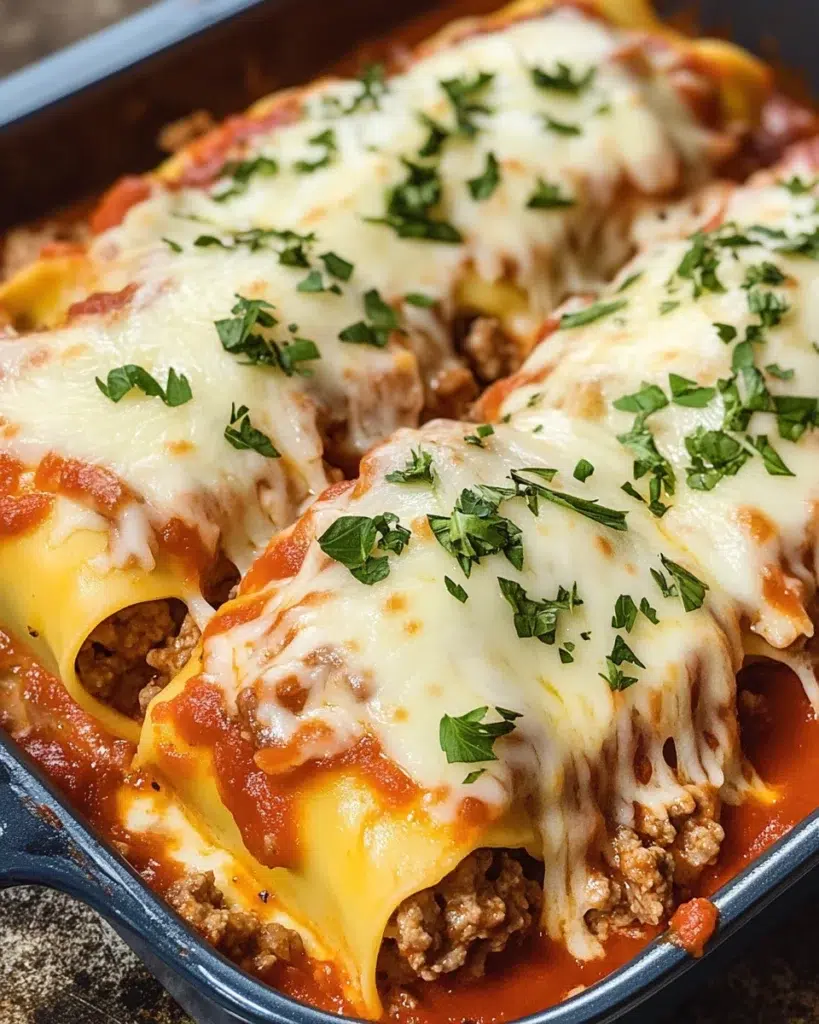
Cheesy beef lasagna rolls topped with melted mozzarella and marinara sauce.
Golden, bubbly lasagna rolls with gooey cheese and savory beef filling.

Preparing the Pasta Sheets

  1. Cook lasagna noodles in salted water until al dente.
  2. Drain and lay flat on parchment to prevent sticking.

Making the Beef Filling

  1. Heat olive oil in a skillet, add onion and garlic, and sauté until fragrant.
  2. Stir in ground beef, season with salt and pepper, and cook until browned.
  3. Mix in ricotta, half of the mozzarella, parmesan, egg, and parsley.

Rolling & Baking Like a Pro

  1. Spread beef-cheese mixture evenly over each lasagna noodle.
  2. Roll up tightly and place seam-side down in a greased baking dish.
  3. Pour marinara sauce over rolls, sprinkle with remaining mozzarella.
  4. Cover with foil and bake at 375°F (190°C) for 25 minutes.
  5. Remove foil and bake 10 minutes more until cheese is golden.
  6. Garnish with fresh basil before serving.

Cooking Tips & Variations for Cheesy Beef Lasagna Rolls

Vegetarian Substitutes & Lighter Versions

Swap beef with spinach and ricotta for a lighter vegetarian version. Ground turkey or chicken works great for leaner protein.

Extra-Cheesy Options for Cheese Lovers

Add a layer of provolone or fontina for a cheesier pull. For a bold twist, mix in a bit of blue cheese or gouda.

How to Freeze & Reheat Perfectly

  • Freeze before baking: Assemble rolls, cover tightly, and freeze up to 2 months.
  • Reheat: Thaw overnight in the fridge, then bake as usual.

Nutrition Facts – Are Cheesy Beef Lasagna Rolls Healthy?

While indulgent, lasagna rolls can be part of a balanced diet. Here’s a breakdown per serving (1 roll, assuming 6 servings):

NutrientAmount% Daily Value*
Calories38019%
Protein23g46%
Carbs28g9%
Fat18g27%
Fiber3g12%
*Percent Daily Values are based on a 2,000 calorie diet.

For more details on beef nutrition, see Healthline’s Guide to Ground Beef.

Pairings & Serving Ideas for Cheesy Beef Lasagna Rolls

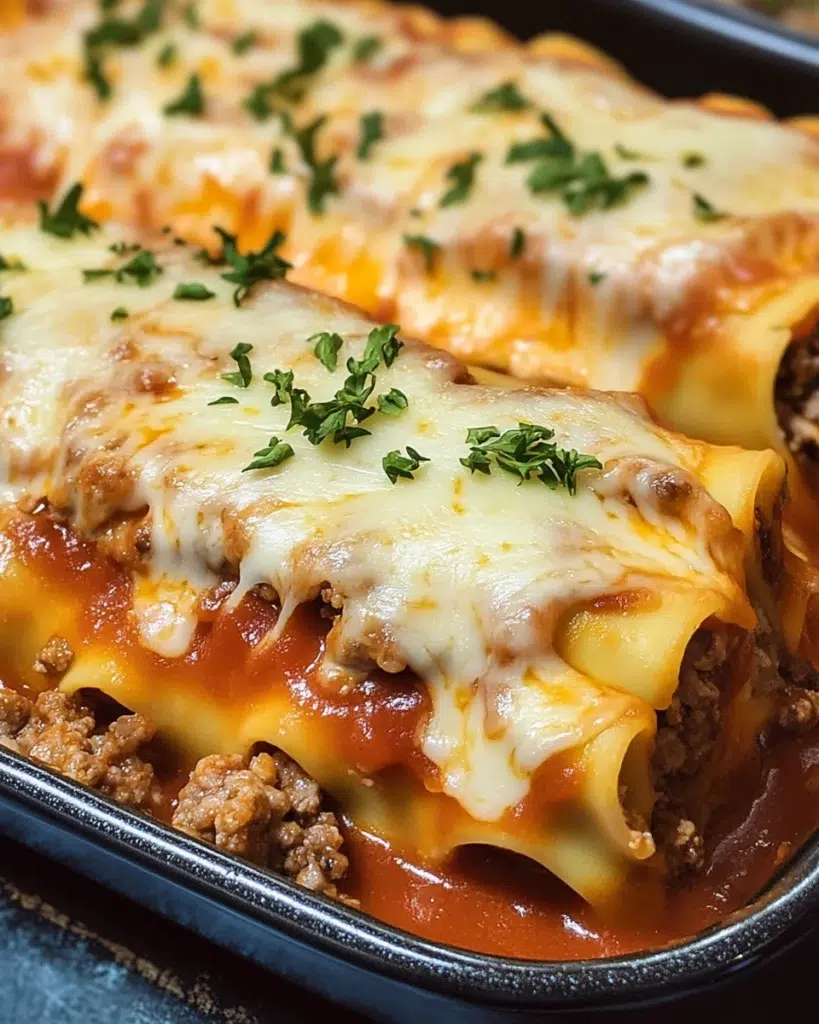
Cheesy beef lasagna rolls topped with melted mozzarella and marinara sauce.
Golden, bubbly lasagna rolls with gooey cheese and savory beef filling.

Side Dishes That Work Best

  • Garlic breadsticks
  • Caesar or arugula salad
  • Roasted broccoli or zucchini

Drinks & Wines to Pair With Lasagna Rolls

  • Red wines like Chianti or Cabernet Sauvignon
  • Sparkling water with lemon for a lighter option
  • For kids: apple juice or iced tea

FAQs About Cheesy Beef Lasagna Rolls

Is beef lasagna good?

Yes! Beef adds richness and flavor that pairs beautifully with cheese and pasta.

What are lasagna rolls?

They’re individual portions of lasagna where each noodle is filled, rolled up, and baked with sauce and cheese.

What’s the difference between lasagna and lasagne?

Lasagna (singular) refers to the noodle itself in Italian, while lasagne (plural) refers to the dish. In the U.S., “lasagna” is most common.

How tasty is lasagna?

It’s a universal comfort food—savory, cheesy, filling, and endlessly adaptable.

Conclusion – Why Cheesy Beef Lasagna Rolls Deserve a Spot in Your Weekly Menu

Cheesy Beef Lasagna Rolls are more than just a fun twist on lasagna—they’re practical, delicious, and perfect for family dinners or meal prep. Whether you stick to the classic beef-and-cheese combo or experiment with variations, these rolls will quickly become a staple at your table.

For more comforting ideas, check out our Dinner Recipes section.

Print
clock clock iconcutlery cutlery iconflag flag iconfolder folder iconinstagram instagram iconpinterest pinterest iconfacebook facebook iconprint print iconsquares squares iconheart heart iconheart solid heart solid icon
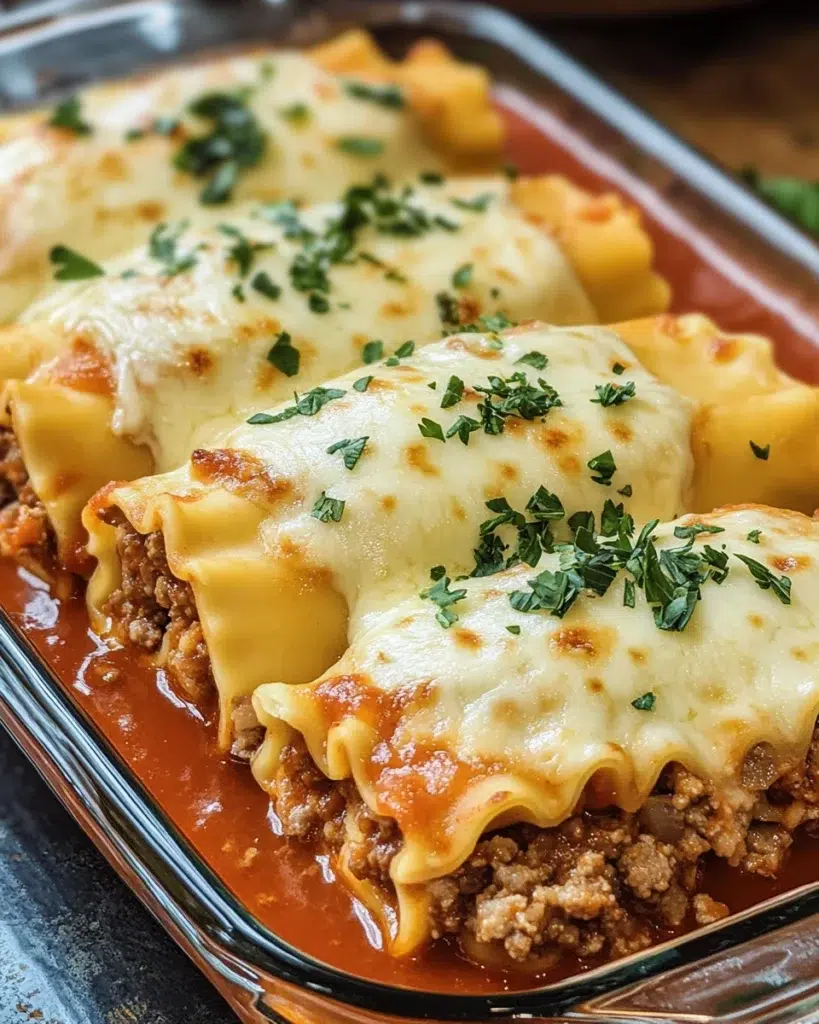
Cheesy beef lasagna rolls topped with melted mozzarella and marinara sauce.

Cheesy Beef Lasagna Rolls – The Ultimate Comfort Food Recipe


5 Stars 4 Stars 3 Stars 2 Stars 1 Star

No reviews

  • Author: Aleena
  • Total Time: 55 minutes
  • Yield: 6 servings 1x

Description

Make cheesy beef lasagna rolls with gooey cheese, savory beef, and marinara. Perfect family comfort food, ready in under 1 hour!


Ingredients

Scale

12 lasagna noodles (cooked al dente)

1 lb (450 g) lean ground beef

1 small onion, finely diced

3 garlic cloves, minced

1 cup ricotta cheese

2 cups shredded mozzarella cheese (divided)

½ cup grated parmesan cheese

1 large egg

3 cups marinara sauce (homemade or store-bought)

2 tbsp olive oil

2 tbsp fresh parsley, chopped

1 tbsp fresh basil (optional, for garnish)

Salt & pepper, to taste


Instructions

  1. Preheat oven to 375°F (190°C).
  2. Cook lasagna noodles in salted water until al dente. Drain and lay flat on parchment.
  3. In a skillet, heat olive oil. Sauté onion and garlic until fragrant.
  4. Add ground beef, season, and cook until browned. Remove from heat.
  5. In a large bowl, combine beef, ricotta, half the mozzarella, parmesan, egg, parsley, salt, and pepper.
  6. Spread filling evenly over noodles, roll tightly, and place seam-side down in a greased baking dish.
  7. Pour marinara sauce over rolls, sprinkle with remaining mozzarella.
  8. Cover with foil and bake for 25 minutes. Remove foil and bake another 10 minutes until golden and bubbly.
  9. Garnish with basil, serve hot.

Notes

Swap beef with turkey, chicken, or sautéed spinach for variety.
Can be assembled and frozen before baking for up to 2 months.
Great served with garlic bread and salad.

  • Prep Time: 20 minutes
  • Cook Time: 35 minutes

Nutrition

  • Calories: 380 kcal
  • Fat: 18g
  • Carbohydrates: 28g
  • Fiber: 3 g
  • Protein: 23g

There’s something magical about walking into a neighborhood pizzeria in New York. I still remember my first bite of Irresistibly Gooey & Buttery Garlic Knots – Your New Favorite Party Side! The smell of dough baking in a stone oven, the sound of garlic sizzling in butter, and the warmth of friends sharing a basket of knots on a Friday night—it’s pure comfort food.

Over time, garlic knots moved from a humble pizzeria side dish to a must-have at birthday parties, potlucks, and holiday spreads. They’re small, fun, and always gone within minutes. Thanks for being here. I hope these recipes bring warmth to your kitchen and a little joy to your day.

Table of Contents
Freshly baked garlic knots brushed with butter and garlic in a basket
A basket of freshly baked garlic knots brushed with melted butter and parsley.

What Makes Irresistibly Gooey & Buttery Garlic Knots So Special

The Role of Butter and Garlic

The magic lies in the glaze. Melted butter carries minced garlic across every golden layer of the knot. Each bite offers richness, aroma, and a soft crunch.

Soft Dough Meets Golden Crust

The balance of textures makes garlic knots addictive: soft, pillowy centers wrapped in golden, slightly crisp crusts. When brushed with garlic butter fresh from the oven, the aroma alone can draw people into the kitchen.

Ingredients for Irresistibly Gooey & Buttery Garlic Knots

Pantry Staples You Already Have

Here’s a quick table for easy reference:

IngredientAmountNote
All-purpose flour3 cupsProvides structure
Active dry yeast2 ¼ tspFor rise and texture
Warm water1 cupActivates yeast
Sugar1 tbspHelps yeast feed
Salt1 tspBalances flavor
Olive oil2 tbspMoistens dough
Butter½ cup meltedFor garlic glaze
Garlic6 cloves mincedStar of the recipe
Fresh parsley2 tbsp choppedAdds color and freshness

Choosing the Best Garlic and Butter

Fresh garlic cloves deliver the boldest flavor. Use unsalted butter so you can control the seasoning. For extra depth, consider browning your butter slightly before mixing in garlic.

Step-by-Step Instructions for Homemade Garlic Knots

Freshly baked garlic knots brushed with butter and garlic in a basket
A basket of freshly baked garlic knots brushed with melted butter and parsley.

Mixing and Proofing the Dough

  1. Combine warm water, yeast, and sugar. Let sit until foamy.
  2. Add flour, salt, and olive oil. Mix until dough forms.
  3. Knead for 8 minutes until smooth. Cover and let rise for 1 hour.

Shaping Classic Knots

  1. Divide dough into 12 pieces.
  2. Roll each into a rope and tie into a knot.
  3. Place on a baking sheet lined with parchment.

Baking and Butter Brushing

  1. Bake at 400°F for 12–15 minutes until golden brown.
  2. Mix melted butter, garlic, and parsley.
  3. Brush warm knots generously before serving.

Pro Tips to Elevate Your Gooey Garlic Knots

Adding Cheese, Herbs, or Chili Flakes

Want to level up? Sprinkle Parmesan, mozzarella, or chili flakes over hot knots for an irresistible twist.

Making Ahead and Freezing

Garlic knots freeze beautifully. Shape and freeze raw dough knots, then bake straight from the freezer when guests arrive.

Nutrition & Health Insights: Are Garlic Knots Unhealthy?

Calories, Protein, Carbs, and Fats

Nutrition (per knot)Amount
Calories180
Protein5g
Carbs24g
Fat7g
Fiber1g

Lighter Substitutions for a Healthier Bite

Freshly baked garlic knots brushed with butter and garlic in a basket
A basket of freshly baked garlic knots brushed with melted butter and parsley.

Swap half the flour with whole wheat, reduce butter, or bake smaller knots for portion control. Healthline explains how whole grains add fiber and satiety.

Serving Ideas – The Best Dips & Pairings

Classic Marinara

Nothing beats dipping warm garlic knots into tangy marinara sauce.

Creamy Ranch & Garlic Butter Dips

For richer options, pair knots with ranch dressing or extra garlic butter. As Serious Eats notes, balance of fat and acid makes dipping sauces pop.

FAQs About Garlic Knots

What is the meaning of garlic knots?

Garlic knots are small bread rolls tied into knots, brushed with garlic butter, and baked until golden.

Do you cook marketside garlic knots in the bag?

No. Remove store-bought garlic knots from packaging before baking.

How unhealthy are garlic knots?

In moderation, garlic knots are fine. Like most bread-based snacks, they’re carb-heavy but can fit into a balanced diet.

What culture is garlic knots?

Garlic knots were invented in Italian-American pizzerias in New York in the 1970s, making them a staple of U.S. food culture.

Conclusion: Bring Gooey & Buttery Garlic Knots to Your Table

Garlic knots embody everything we love about comfort food: soft bread, buttery garlic glaze, and the joy of sharing with others. Whether at a family dinner or game night, they’ll always disappear first. For more cozy sides, check out our Dinner Recipes.

Fore nore recipes fpllowe me in facebook and pinterest .

Print
clock clock iconcutlery cutlery iconflag flag iconfolder folder iconinstagram instagram iconpinterest pinterest iconfacebook facebook iconprint print iconsquares squares iconheart heart iconheart solid heart solid icon
Irresistibly Gooey & Buttery Garlic Knots – Your New Favorite Party Side!

A New York Story Behind Garlic Knots


5 Stars 4 Stars 3 Stars 2 Stars 1 Star

No reviews

  • Author: Aleena
  • Total Time: 35 minutes
  • Yield: 12 knots 1x

Description

These Irresistibly Gooey & Buttery Garlic Knots are the perfect party side dish! Made from soft homemade dough, brushed with garlic butter, and baked until golden brown, they’re the ultimate appetizer. Serve them warm with marinara or alfredo dipping sauce, and watch them disappear at your table.


Ingredients

Scale

3 cups all-purpose flour

2 ¼ tsp active dry yeast (1 packet)

1 cup warm water (110°F)

1 tbsp sugar

1 tsp salt

2 tbsp olive oil

½ cup unsalted butter, melted

6 cloves garlic, minced

2 tbsp fresh parsley, chopped

Optional: marinara or Alfredo sauce for dipping


Instructions

  1. Activate yeast – In a bowl, mix warm water, yeast, and sugar. Let it sit 5–8 minutes until foamy.
  2. Make dough – Add flour, salt, and olive oil. Mix until dough forms. Knead on a floured surface for 8 minutes until smooth.

  3. First rise – Place dough in a greased bowl, cover, and let rise 1 hour until doubled.

  4. Shape knots – Punch down dough. Divide into 12 pieces. Roll each into a rope and tie into a knot.

  5. Bake – Place knots on a parchment-lined sheet. Bake at 400°F (200°C) for 12–15 minutes until golden.

  6. Garlic butter glaze – Mix melted butter, garlic, and parsley. Brush over warm knots.


Serve – Enjoy warm with marinara or Alfredo dipping sauce.

Notes

Swap parsley for fresh basil for a twist.
Use pre-made pizza dough to save time.
Best served fresh, but leftovers can be reheated in the oven at 350°F for 5 minutes.

  • Prep Time: 10 minutes
  • Cook Time: 15 minutes
  • Category: breakfast
  • Method: Frying
  • Cuisine: American

Nutrition

  • Calories: 180 kcal
  • Sugar: 2 g
  • Sodium: 180 mg
  • Fat: 7 g
  • Carbohydrates: 24g
  • Fiber: 1 g
  • Protein: 5 g

The first time I tried Tuscan Chicken Alfredo Pasta wasn’t in Florence, Rome, or Venice it was in a small family-run Italian restaurant tucked into the busy streets of New York City. I had just left work late on a rainy Tuesday evening, and the warm aroma of garlic, butter, and Parmesan pulled me inside.

The waiter recommended their “house-special Tuscan Alfredo,” and when the dish arrived, I knew I was in for something unforgettable. Golden seared chicken sat on a bed of silky Alfredo pasta, rich with cream, garlic, and Parmesan. Sun-dried tomatoes, fresh spinach, and herbs added a burst of Tuscan flair. One bite, and I felt transported straight to the rolling hills of Tuscany.

That moment stayed with me. It was proof that food is more than just fuel—it’s memory, culture, and comfort on a plate. Today, I’m sharing a recipe that captures that same magic, but one you can easily make at home in under an hour.

Thanks for being here. I hope these recipes bring warmth to your kitchen and a little joy to your day

Table of Contents
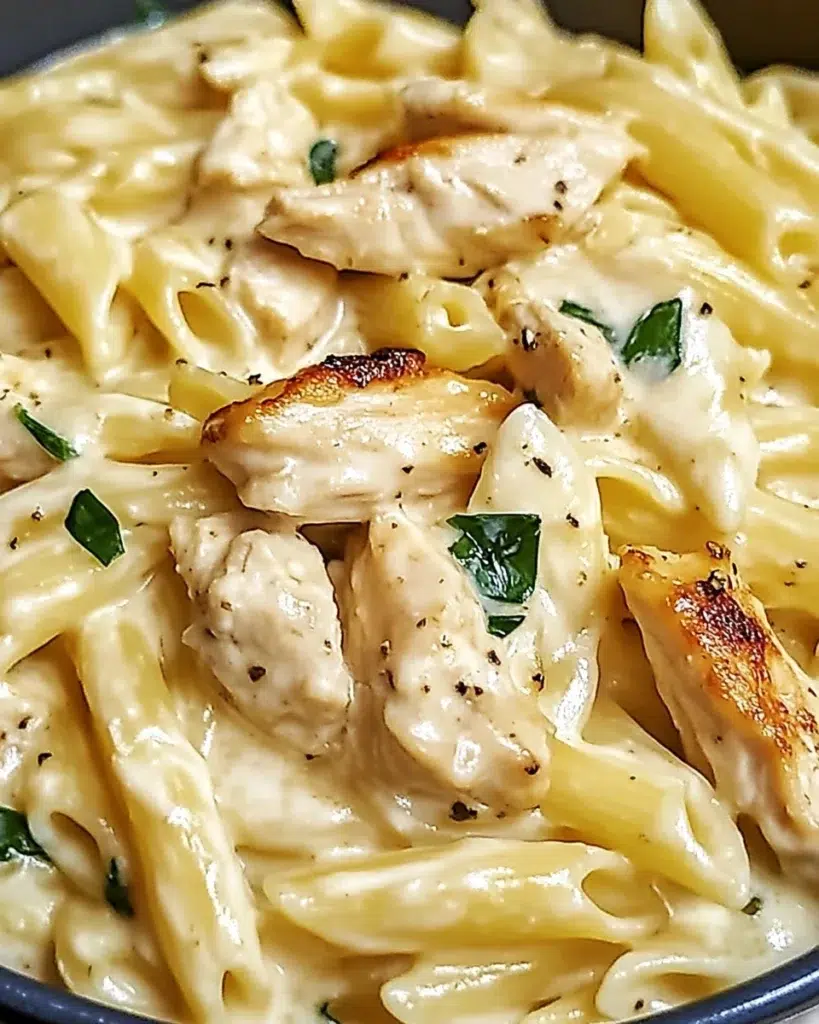
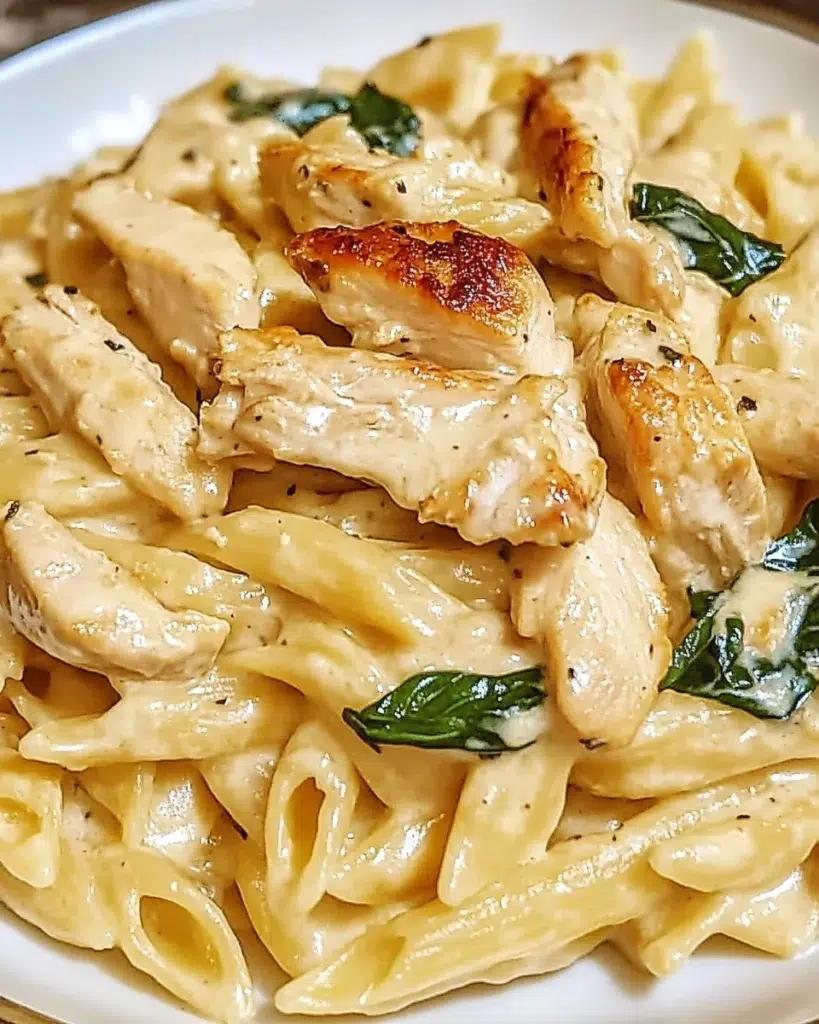
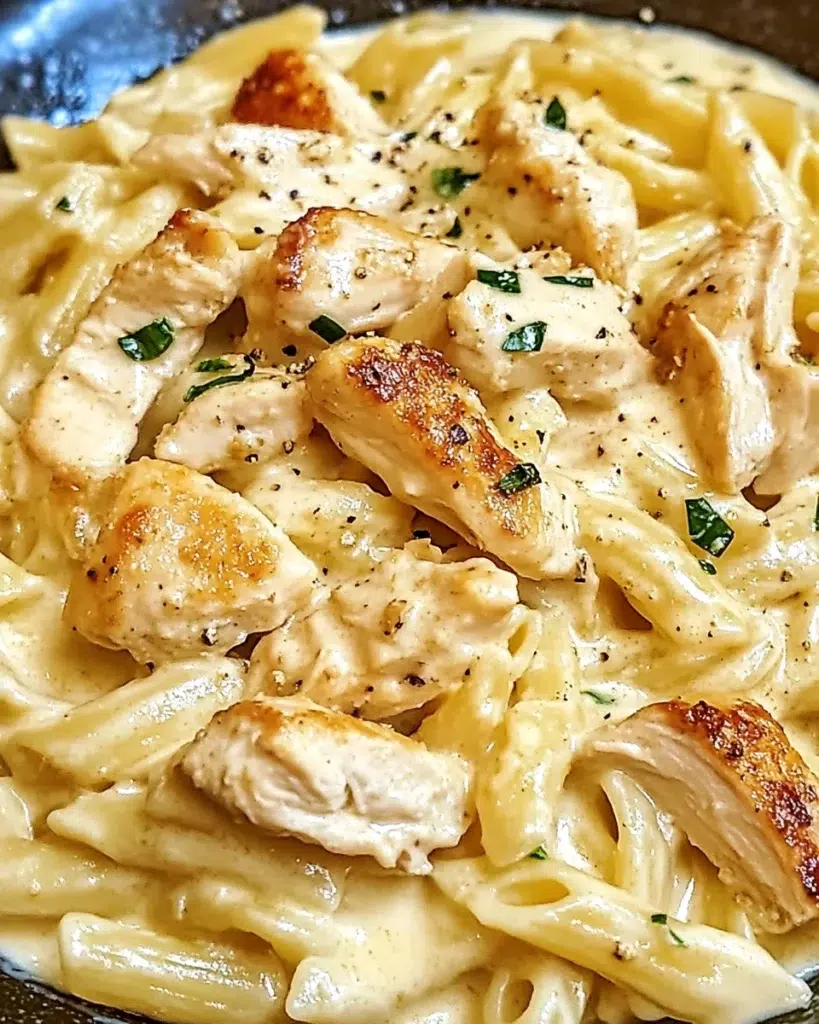
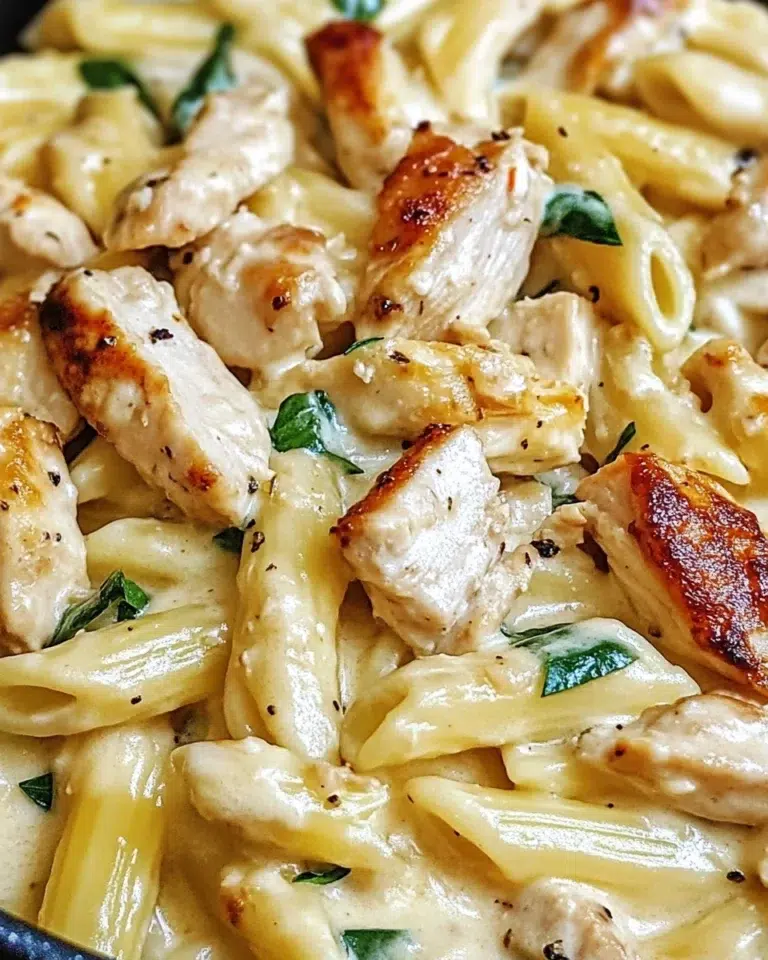
Tuscan Chicken Alfredo Pasta with creamy garlic sauce and sun-dried tomatoes served in a white bowl
Creamy Tuscan Chicken Alfredo Pasta with spinach and sun-dried tomatoes.


What Makes Tuscan Chicken Alfredo Pasta So Special?

Tuscan Chicken Alfredo Pasta is the perfect blend of Italian flavors and American comfort food. The traditional Alfredo sauce, with its creamy Parmesan richness, meets the rustic Tuscan ingredients of sun-dried tomatoes, garlic, spinach, and herbs.

  • Why it works: The dish balances richness with freshness—creamy sauce hugs the pasta, while vegetables add brightness.
  • Perfect for U.S. kitchens: Easy to make in one skillet, approachable ingredients, and a guaranteed crowd-pleaser.

Whether you’re cooking for family dinner, date night, or meal prepping for the week, this dish fits the occasion.

Key Ingredients for Tuscan Chicken Alfredo Pasta

IngredientWhy It Matters
Chicken breast or thighsLean protein that soaks up flavor
Fettuccine or penne pastaHolds sauce beautifully
Garlic & onionBuild the flavor base
Sun-dried tomatoesSignature Tuscan tang and sweetness
SpinachAdds color and nutrients
Heavy creamCreamy Alfredo foundation
Parmesan cheeseRich, salty, nutty flavor
Olive oil & butterBlend of richness and authenticity
Italian herbs (oregano, basil)Classic Tuscan seasoning

👉 Pro Tip: Use fresh Parmesan and grate it yourself—pre-shredded cheese doesn’t melt as smoothly.

Step-by-Step Guide: How to Make Tuscan Chicken Alfredo Pasta

Tuscan Chicken Alfredo Pasta with creamy garlic sauce and sun-dried tomatoes served in a white bowl
Creamy Tuscan Chicken Alfredo Pasta with spinach and sun-dried tomatoes.

Prepping the Chicken

  • Slice chicken breasts thinly for quick cooking.
  • Season with salt, pepper, paprika, and garlic powder.
  • Pan-sear in olive oil until golden and cooked through. Remove and set aside.

Cooking the Pasta

  • Boil pasta in salted water until al dente.
  • Save 1 cup of pasta water for adjusting sauce later.

Making the Creamy Alfredo Sauce

  1. In the same pan, melt butter and sauté garlic.
  2. Stir in heavy cream, Parmesan, and sun-dried tomatoes.
  3. Add Italian herbs, salt, and pepper. Simmer until thickened.

Bringing It All Together

  • Add spinach and let it wilt.
  • Stir in cooked pasta and chicken.
  • Toss with a splash of pasta water for creaminess.
  • Garnish with fresh basil and more Parmesan.

👉 Result: A silky, cheesy pasta dish with juicy chicken and Tuscan flair.

Variations You’ll Love

  • Tuscan Shrimp Alfredo: Replace chicken with shrimp for a seafood twist.
  • Vegetarian Tuscan Alfredo: Swap protein for mushrooms, zucchini, or roasted chickpeas.
  • Lightened-Up Version: Use half-and-half or Greek yogurt instead of heavy cream.

Serving Ideas: What Goes with Tuscan Chicken Alfredo Pasta?

  • Bread Pairings: Garlic breadsticks or warm focaccia (try Irresistible Garlic Rosemary Focaccia Muffins).
  • Side Salads: A crisp Caesar salad or simple arugula lemon salad balances the richness.
  • Wine Choices: A buttery Chardonnay or light Pinot Grigio pairs perfectly.

Nutrition Facts & Healthy Adjustments

Tuscan Chicken Alfredo Pasta with creamy garlic sauce and sun-dried tomatoes served in a white bowl
Creamy Tuscan Chicken Alfredo Pasta with spinach and sun-dried tomatoes.
Nutrient (per serving)Amount
Calories~650 kcal
Protein42 g
Carbs52 g
Fat28 g
Fiber4 g

Healthy Adjustments:

  • Use whole wheat pasta for more fiber.
  • Swap cream with cashew cream for dairy-free.
  • Add extra veggies like broccoli or asparagus.

Quick Tips for Perfect Creamy Alfredo Every Time

  • Don’t overheat cream: Keep sauce at medium heat to avoid curdling.
  • Juicy chicken tip: Sear chicken at high heat first, then finish on lower heat.
  • Garnish like a pro: Fresh basil, cracked pepper, and a drizzle of olive oil elevate presentation.

FAQs About Tuscan Chicken Alfredo Pasta

What is Tuscan chicken pasta made of?

Chicken, pasta, Alfredo sauce, sun-dried tomatoes, spinach, and Italian herbs.

What pasta is best for chicken alfredo?

Fettuccine is classic, but penne and rigatoni also work great.

Is jerk pasta the same as rasta pasta?

No. Jerk pasta uses Jamaican jerk seasoning. Rasta pasta is creamy Caribbean-inspired pasta with peppers.

Q: How many calories are in a plate of chicken alfredo pasta?

Around 600–800 calories depending on portion size and ingredients.

Conclusion: Why This Dish Belongs in Your Weekly Rotation

Tuscan Chicken Alfredo Pasta isn’t just another pasta dish—it’s a full experience. Creamy, cheesy, garlicky, with Tuscan charm, it’s versatile enough for family dinners or weekend gatherings.

If you love this, you’ll also enjoy exploring our Easy Chicken Dinner Recipes.

Print
clock clock iconcutlery cutlery iconflag flag iconfolder folder iconinstagram instagram iconpinterest pinterest iconfacebook facebook iconprint print iconsquares squares iconheart heart iconheart solid heart solid icon
Tuscan Chicken Alfredo Pasta with creamy garlic sauce and sun-dried tomatoes served in a white bowl

Tuscan Chicken Alfredo Pasta – Creamy & Flavorful Recipe


5 Stars 4 Stars 3 Stars 2 Stars 1 Star

No reviews

  • Author: Aleena
  • Total Time: 45 minutes
  • Yield: 4 servings 1x

Description

Make Tuscan Chicken Alfredo Pasta at home! Creamy sauce, juicy chicken, and Tuscan flavors in one irresistible dish.


Ingredients

Scale

2 chicken breasts, thinly sliced

12 oz fettuccine pasta

3 tbsp olive oil

2 tbsp butter

4 cloves garlic, minced

1 cup heavy cream

1 cup Parmesan cheese, grated

½ cup sun-dried tomatoes

2 cups spinach

1 tsp Italian seasoning

Salt & pepper to taste


Instructions

  1. Cook pasta al dente, reserve pasta water.

  2. Season chicken, sear until golden. Set aside.

  3. Make sauce: butter + garlic, then add cream, Parmesan, tomatoes, and herbs.

  4. Add spinach, chicken, and pasta. Toss with reserved pasta water.


Garnish with basil and serve warm.

Notes

Use penne if you prefer shorter pasta.
Add mushrooms or broccoli for extra veggies.

  • Prep Time: 15 minutes
  • Cook Time: 30 minutes

Nutrition

  • Calories: 650
  • Sugar: 4 g
  • Fat: 28 g
  • Carbohydrates: 52g
  • Protein: 42 g

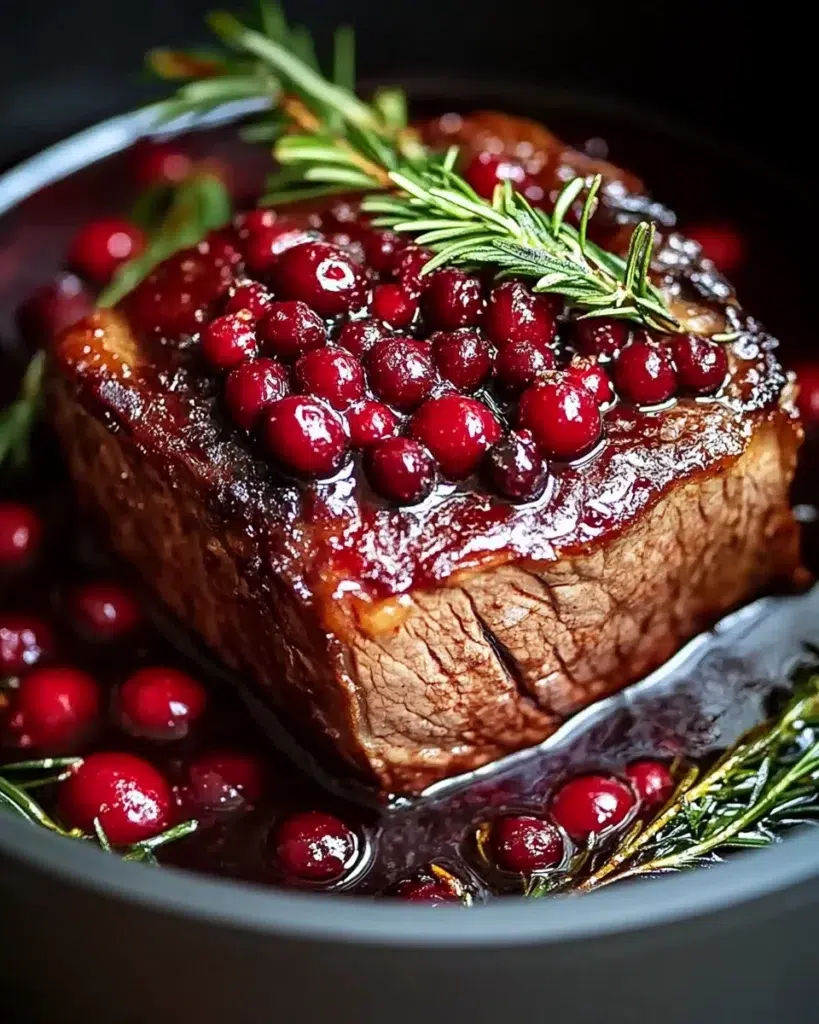
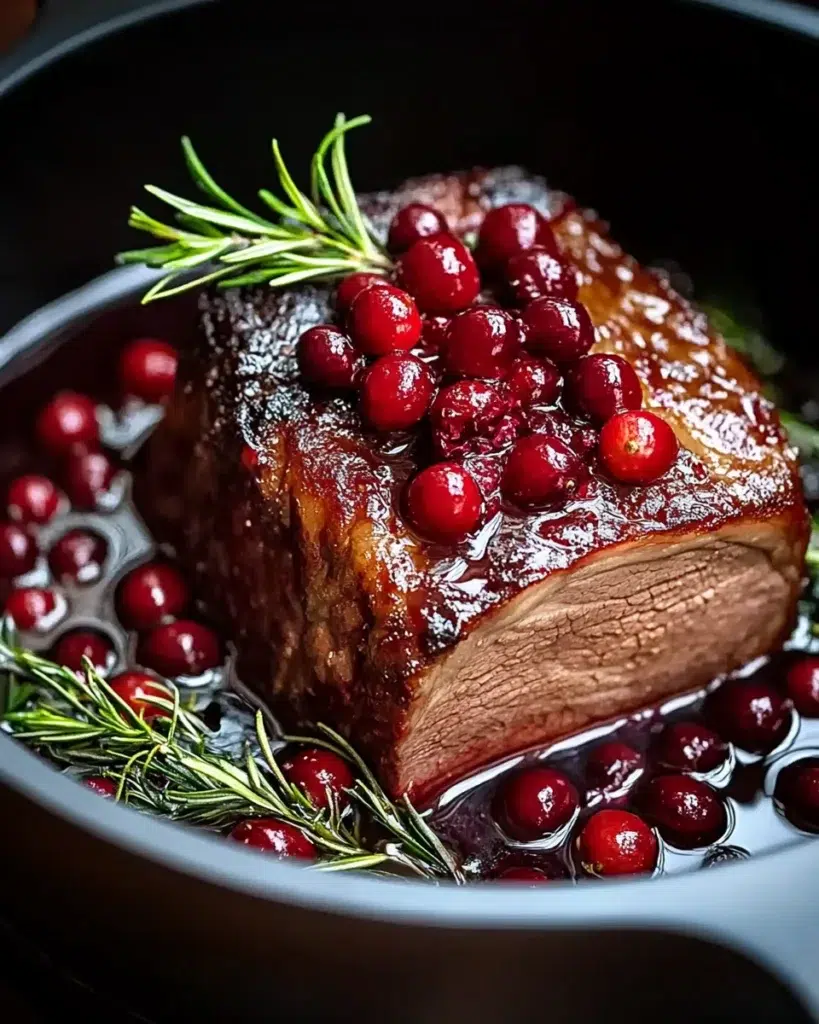
Cranberry Glazed Beef Roast is the kind of dish that instantly elevates any meal, whether it’s a casual weeknight dinner or a festive holiday gathering. I first fell in love with this dish in New York City, during a chilly December evening at a friend’s dinner party. The aroma of slow-roasted beef mingled with the sweet-tart scent of cranberries—it was mesmerizing. With each bite, the tender beef paired with the tangy-sweet glaze created a flavor profile that felt both comforting and luxurious.

The blend of savory and sweet in this roast makes it a standout centerpiece. The cranberries add a festive pop while keeping the dish light, while the beef itself provides hearty, protein-packed satisfaction. This recipe is approachable yet impressive, perfect for anyone looking to bring restaurant-quality flavors into their kitchen.

Thanks for being here. I hope these recipes bring warmth to your kitchen and a little joy to your day.

Table of Contents
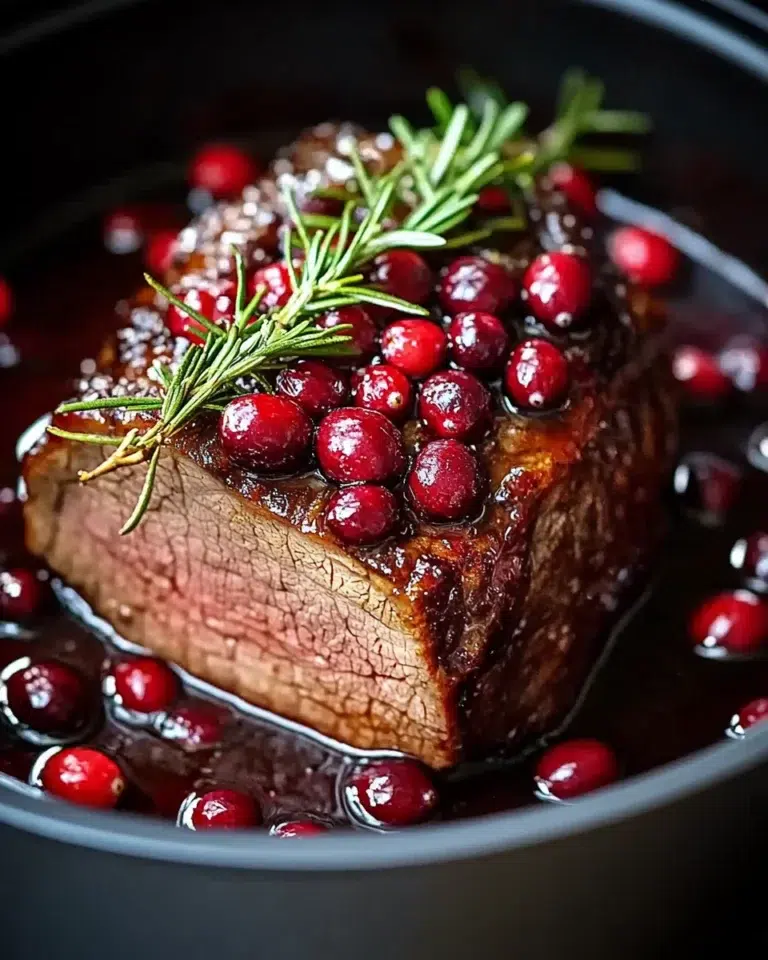
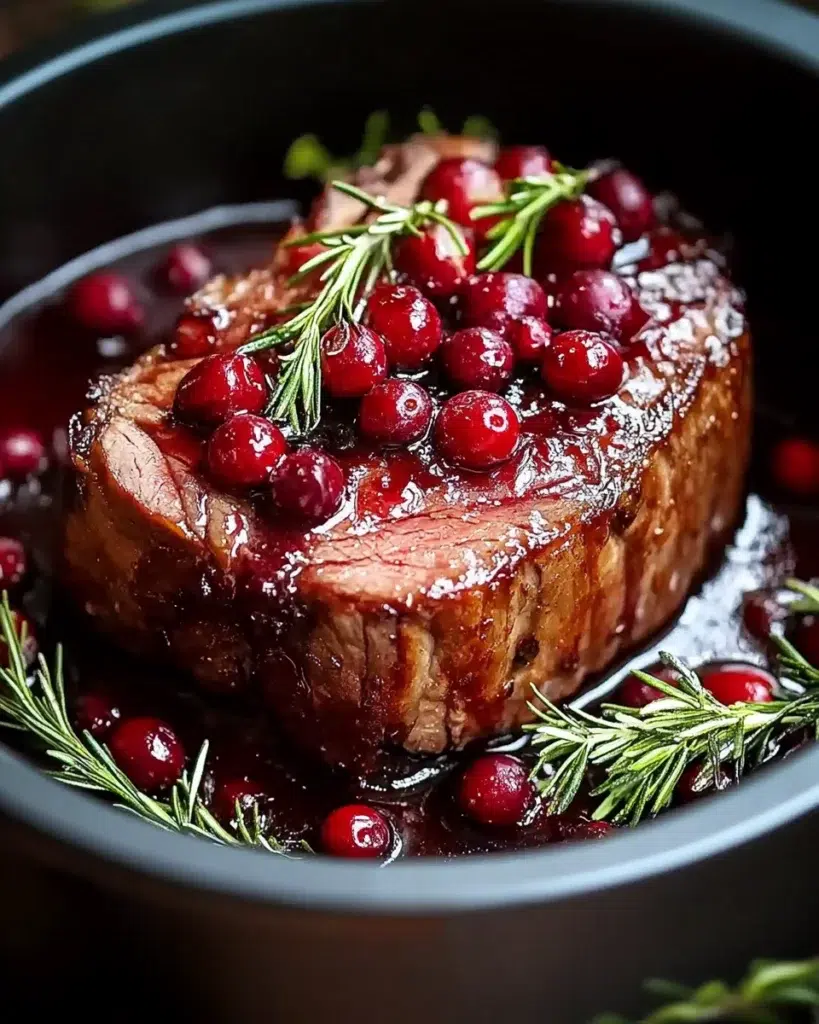
Cranberry glazed beef roast with rosemary and roasted root vegetables on a wooden board
A juicy cranberry-glazed beef roast, finished with fresh rosemary and served with roasted root vegetables.

Why Cranberry Glazed Beef Roast is a Must-Try Dish

Origins of Beef Roasts in U.S. Cuisine

Beef roasting has been a beloved American tradition for centuries. Roasts were a staple for Sunday family dinners and holiday celebrations. Over time, chefs and home cooks alike began experimenting with glazes, spices, and fruits to complement the natural richness of beef.

Cranberry’s Role in Festive Cooking

Cranberries have long symbolized the holiday season. Their natural tartness balances the richness of beef, creating a sophisticated flavor combination. Sweetened cranberry sauces have been paired with turkey for Thanksgiving, and their adaptation with beef provides an equally festive alternative.

Key Ingredients for a Perfect Cranberry Glazed Beef Roast

Choosing the Right Cut of Beef

Beef CutBest ForNotes
Ribeye RoastJuicy, tenderMarbled for extra flavor
Sirloin RoastLeaner optionSlightly firmer texture
Top Round RoastBudget-friendlyWorks well with slow roasting

Selecting the Best Cranberries & Glaze Ingredients

  • Fresh cranberries preferred; frozen works too
  • Brown sugar or maple syrup for sweetness
  • Garlic and rosemary for savory notes
  • Red wine or balsamic vinegar to enhance depth
  • Optional spices: cinnamon, allspice, or black pepper

Pro Tip: Fresh cranberries give a brighter, more vibrant flavor, but frozen cranberries are convenient and still tasty.

Step-by-Step Guide to Making Cranberry Glazed Beef Roast

Cranberry glazed beef roast with rosemary and roasted root vegetables on a wooden board
A juicy cranberry-glazed beef roast, finished with fresh rosemary and served with roasted root vegetables.

Preparing the Beef

  1. Trim excess fat while keeping some for flavor.
  2. Pat dry and season generously with salt, pepper, and garlic powder.
  3. Let beef sit at room temperature for 30 minutes before roasting.

Making the Cranberry Glaze

  1. Combine cranberries, brown sugar, honey, vinegar, garlic, and rosemary in a saucepan.
  2. Simmer until cranberries burst and the mixture thickens.
  3. Adjust sweetness and tang according to taste.

Roasting Tips for Juicy Beef

  • Preheat oven to 375°F (190°C).
  • Roast beef uncovered for first 15 minutes, then brush with glaze every 15–20 minutes.
  • Use a meat thermometer: 135°F for medium rare, 145°F for medium.
  • Let rest 10–15 minutes before slicing to retain juices.

Flavor Variations You’ll Love

Maple Cranberry Beef Roast

Add 2 tablespoons of maple syrup to your cranberry glaze for a deeper, caramelized sweetness.

Garlic and Herb Infused Glaze

Mix fresh thyme, rosemary, and minced garlic into the glaze for an aromatic punch.

Spiced Cranberry Glaze for a Kick

Add a pinch of cinnamon, clove, or cayenne to the glaze for warm, complex flavors.

Side Dishes that Pair Perfectly

Mashed Potatoes & Roasted Veggies

Creamy mashed potatoes balance the tangy glaze, while roasted carrots, parsnips, and Brussels sprouts provide color and texture.

Quinoa or Rice Options

Quinoa or wild rice absorbs the glaze beautifully for a wholesome, hearty side.

Fresh Salad Ideas

A crisp mixed greens salad with citrus vinaigrette complements the richness of the roast.

Nutrition Facts & Health Tips

NutrientAmount per Serving
Calories~410 kcal
Protein35g
Carbs20g
Fat22g
Fiber4g

Lowering Sugar Without Losing Flavor

  • Use less brown sugar and add extra vinegar for balance.
  • Substitute honey or maple syrup for natural sweetness.

Using Lean Cuts for Healthier Meals

Top round or sirloin roasts reduce saturated fat without compromising flavor.

Quick Tips for Restaurant-Quality Beef Roast at Home

Cranberry glazed beef roast with rosemary and roasted root vegetables on a wooden board
A juicy cranberry-glazed beef roast, finished with fresh rosemary and served with roasted root vegetables.
  • Brush glaze gradually to avoid burning sugar.
  • Rest meat before slicing to retain juices.
  • Garnish with fresh rosemary sprigs and a few whole cranberries.
  • Serve immediately for best flavor and presentation.

FAQs About Cranberry Glazed Beef Roast

Q1: What cut of beef is best for roasting?

A1: Ribeye, sirloin, or top round are ideal. Choose based on tenderness preference and budget.

Q2: Can I make the cranberry glaze ahead of time?

A2: Yes! Store in the refrigerator up to 3 days and warm slightly before brushing on beef.

Q3: How long should I cook the beef to medium rare?

A3: Roast at 375°F (190°C) until internal temperature reaches 135°F, usually 20 minutes per pound.

Q4: Can I use frozen cranberries for the glaze?

A4: Absolutely. Thaw slightly before cooking to help the glaze thicken evenly.

Conclusion: Why Cranberry Glazed Beef Roast Belongs on Your Table

Cranberry Glazed Beef Roast combines sweet, tangy, and savory flavors in a way that elevates any occasion. Whether you’re celebrating holidays or simply craving a hearty, elegant meal, this roast is sure to impress. Serve with your favorite sides, garnish with fresh herbs, and enjoy a centerpiece worthy of any table.

For more festive recipes, check out our Holiday Beef Recipes.

Print
clock clock iconcutlery cutlery iconflag flag iconfolder folder iconinstagram instagram iconpinterest pinterest iconfacebook facebook iconprint print iconsquares squares iconheart heart iconheart solid heart solid icon
Cranberry glazed beef roast with rosemary and roasted root vegetables on a wooden board

Cranberry Glazed Beef Roast – Juicy & Festive Recipe


5 Stars 4 Stars 3 Stars 2 Stars 1 Star

No reviews

  • Author: Aleena
  • Total Time: 1 hr 46 mins
  • Yield: 6 servings 1x

Description

Tender, juicy beef roast topped with a sweet and tangy cranberry glaze—perfect for festive meals or cozy dinners.


Ingredients

Scale

34 lb beef roast (ribeye, sirloin, or top round)

1 ½ cups fresh cranberries

¼ cup brown sugar

2 tbsp honey

2 tbsp balsamic vinegar or red wine

2 cloves garlic, minced

1 tsp fresh rosemary, chopped

Salt & pepper, to taste

1 tbsp olive oil


Instructions

  • Preheat oven to 375°F (190°C).

  • Trim roast, season with salt & pepper.

  • In a saucepan, combine cranberries, brown sugar, honey, vinegar, garlic, and rosemary. Simmer 10–12 mins until thick.

  • Sear beef in olive oil on all sides, then place in roasting pan.

  • Roast uncovered for 15 mins, then brush glaze every 15–20 mins until internal temp reaches 135°F (medium rare).


  • Let rest 10–15 mins before slicing. Serve with extra glaze.

Notes

Can use frozen cranberries.
Pair with mashed potatoes, rice, or roasted veggies.
Adjust glaze sweetness to taste.

  • Prep Time: 15 minutes
  • Cook Time: 1 hr 30 mins
  • Category: Main Dish
  • Method: Baking
  • Cuisine: American

Nutrition

  • Calories: 410 kcal
  • Fat: 22g
  • Carbohydrates: 20g
  • Fiber: 4g
  • Protein: 35g

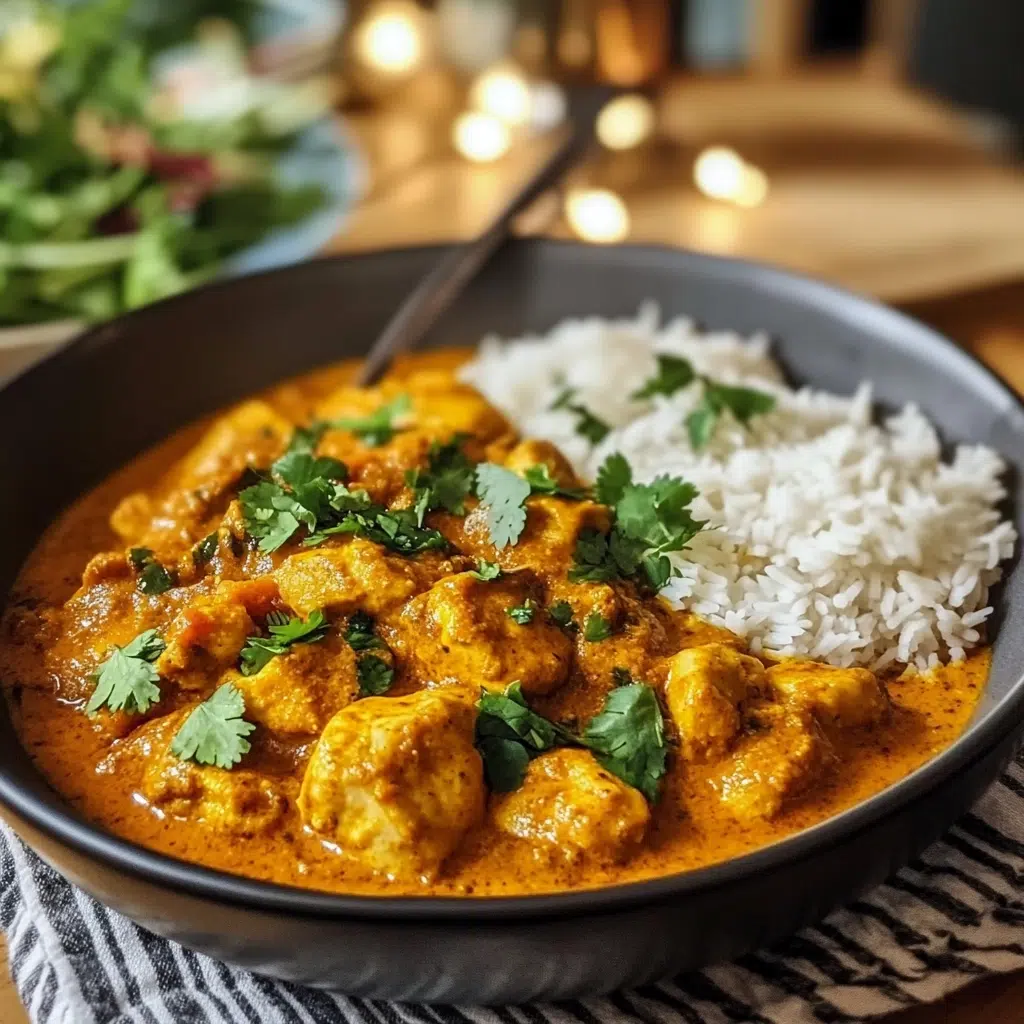
When I first moved to New York, I learned that fall was more than just a season—it was a celebration. Walking through Union Square Greenmarket on crisp October mornings, I’d see piles of pumpkins stacked high, cinnamon sticks sold in bundles, and the air filled with roasted chestnuts. That’s when I discovered how pumpkin could transform more than just pies and lattes. One chilly evening, a friend invited me over, and instead of the classic chicken curry, they added pumpkin spice to the pot. The result? A fragrant, golden-orange curry that felt like fall in a bowl.

That night became my inspiration for this recipe: Pumpkin Spice Chicken Curry. It’s the perfect mix of savory chicken, creamy coconut milk, tender pumpkin, and those warm spices we crave in autumn. Whether you’re cooking for family, friends, or just treating yourself, this dish is comfort food with a seasonal twist.

Thanks for being here. I hope these recipes bring warmth to your kitchen and a little joy to your day.

Table of Contents


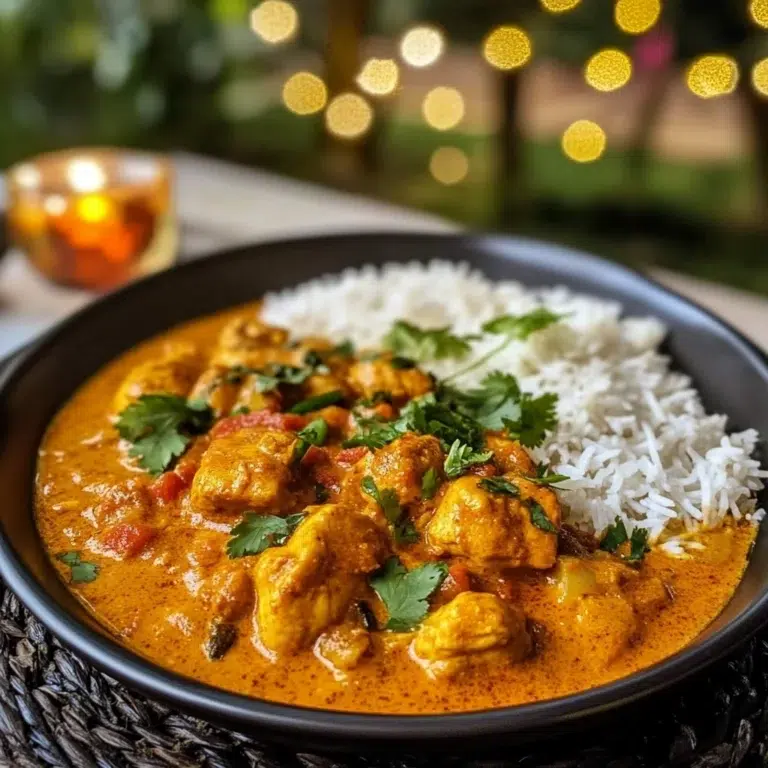
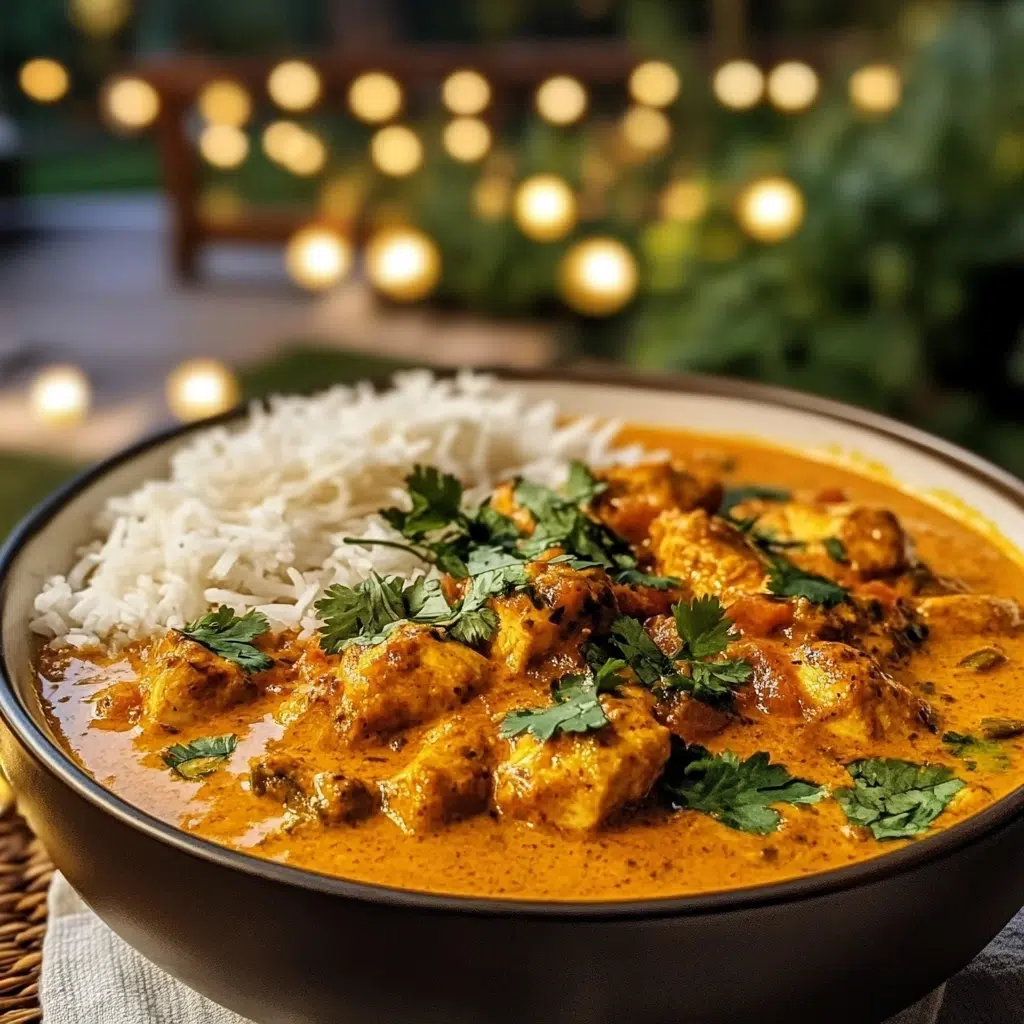
Creamy pumpkin spice chicken curry with fresh cilantro in a white bow
Warm, creamy pumpkin chicken curry perfect for fall dinners

What Makes Pumpkin Spice Chicken Curry Unique?

The Blend of Sweet Pumpkin and Savory Chicken

Pumpkin naturally has a subtle sweetness that balances beautifully with savory chicken. Unlike heavy cream-based curries, pumpkin adds body and flavor without weighing the dish down.

Warm Spices That Create Fall Comfort

Cinnamon, nutmeg, ginger, and cloves bring a cozy fall feel. When paired with curry powder, garlic, and onion, you get depth and balance in every bite.

Nutritional Benefits of Pumpkin & Lean Protein

Pumpkin is rich in vitamin A, potassium, and fiber. Chicken provides lean protein, making this curry filling and nutrient-packed. Together, they create a wholesome dish perfect for cold evenings.

Ingredients for the Perfect Pumpkin Spice Chicken Curry

Here’s what you’ll need to bring this cozy curry together:

IngredientAmount
Boneless chicken thighs (or breast)1.5 lbs, cubed
Fresh pumpkin (or canned puree)2 cups, diced
Onion, chopped1 medium
Garlic, minced4 cloves
Fresh ginger, grated1 tbsp
Curry powder2 tbsp
Pumpkin spice mix1 tsp
Coconut milk1 can (13.5 oz)
Chicken broth1 cup
Olive oil2 tbsp
Salt & pepperTo taste
Fresh cilantroFor garnish
Lime wedgesOptional

Fresh Pumpkin vs Canned Pumpkin – Which to Use

  • Fresh pumpkin gives more texture and a natural sweetness.
  • Canned pumpkin puree saves time and makes the curry creamier.

Protein Choices: Chicken Breast vs Thighs

  • Breast = leaner and lighter.
  • Thighs = juicier and more flavorful.

Curry Base Essentials

Coconut milk makes it creamy, garlic and ginger add heat, and curry powder ties it all together.

Step-by-Step Guide: How to Make Pumpkin Chicken Curry

Creamy pumpkin spice chicken curry with fresh cilantro in a white bow
Warm, creamy pumpkin chicken curry perfect for fall dinners

Prepping the Pumpkin & Chicken

  • Peel and dice pumpkin into small cubes.
  • Cut chicken into bite-sized pieces and season lightly with salt and pepper.

Building Flavor with Spices

  1. Heat olive oil in a large pot.
  2. Sauté onion until golden.
  3. Add garlic, ginger, curry powder, and pumpkin spice mix. Stir until fragrant.

Simmering for the Perfect Creamy Curry

  1. Add chicken and brown for 3–4 minutes.
  2. Stir in pumpkin cubes and chicken broth.
  3. Simmer until pumpkin is soft.
  4. Pour in coconut milk and cook until thickened.
  5. Garnish with cilantro and a squeeze of lime.
Cooking StageTime
Prep15 minutes
Cooking30 minutes
Total45 minutes

Tips and Tricks for the Best Pumpkin Curry Recipe

How to Balance Sweetness and Spice

  • Add a dash of chili flakes if it’s too sweet.
  • A spoon of honey balances if it’s too spicy.

Substitutions for Different Diets

  • Dairy-free: Already dairy-free with coconut milk.
  • Vegan: Replace chicken with chickpeas or tofu.
  • Gluten-free: Naturally gluten-free when served with rice.

Storage & Reheating

  • Store in airtight containers for up to 3 days.
  • Reheat gently with a splash of broth to restore creaminess.

What to Serve with Pumpkin Spice Chicken Curry

Creamy pumpkin spice chicken curry with fresh cilantro in a white bow
Warm, creamy pumpkin chicken curry perfect for fall dinners

Best Sides

  • Steamed jasmine rice
  • Garlic naan bread
  • Fluffy quinoa

Drinks That Pair Well

  • A crisp white wine like Sauvignon Blanc
  • Chai tea for cozy evenings

Seasonal Serving Ideas

  • Serve at a Thanksgiving dinner as a unique side.
  • Perfect for Sunday family meals in fall.

Nutrition Facts of Pumpkin Chicken Curry

NutritionPer Serving
Calories380
Protein28g
Carbohydrates18g
Fat22g
Fiber4g
Vitamin A120% DV
Potassium15% DV

Pumpkin adds antioxidants and vitamins (source: Healthline). Chicken gives sustained protein for energy.

Frequently Asked Questions (FAQs)

How to make curry with pumpkin?

Cook pumpkin with onion, garlic, curry powder, and coconut milk until soft.

How to make pumpkin chicken curry?

Brown chicken, add pumpkin cubes, broth, spices, and coconut milk. Simmer until creamy.

Can pumpkin and chicken be eaten together?

Yes! Pumpkin adds sweetness that balances chicken’s savory taste.

What type of pumpkin for curry?

Sugar pumpkins or pie pumpkins work best.

What is Tuscan chicken pasta made of?

It’s made with chicken, creamy Alfredo sauce, sun-dried tomatoes, garlic, and spinach.

What pasta is best for chicken alfredo?

Fettuccine, because it holds creamy sauce well.

Is jerk pasta the same as rasta pasta?

Not exactly. Rasta pasta has a creamy base; jerk pasta uses spicy jerk seasoning.

How many calories are in a plate of chicken alfredo pasta?

A typical serving has around 600–1,200 calories depending on portion size.
Conclusion – Why Pumpkin Spice Chicken Curry Deserves a Spot on Your Table

Pumpkin Spice Chicken Curry is comfort in a bowl—creamy, savory, slightly sweet, and packed with nutrients. It’s versatile, family-friendly, and perfect for cozy fall nights. If you’re ready to try more cozy dinners, check out our Savory Ground Beef & Garlic Rice Skillet.

Print
clock clock iconcutlery cutlery iconflag flag iconfolder folder iconinstagram instagram iconpinterest pinterest iconfacebook facebook iconprint print iconsquares squares iconheart heart iconheart solid heart solid icon
Creamy pumpkin spice chicken curry with fresh cilantro in a white bow

Pumpkin Spice Chicken Curry – A Cozy Fall Favorite


5 Stars 4 Stars 3 Stars 2 Stars 1 Star

No reviews

  • Author: Aleena
  • Total Time: 45 minutes
  • Yield: 4 servings 1x

Description

Creamy Pumpkin Spice Chicken Curry with warm fall spices, tender chicken, and pumpkin – perfect for cozy weeknight dinners


Ingredients

Scale

1.5 lbs boneless chicken thighs, cubed

2 cups fresh pumpkin, diced (or canned pumpkin puree)

1 medium onion, chopped

4 garlic cloves, minced

1 tbsp fresh ginger, grated

2 tbsp curry powder

1 tsp pumpkin spice mix

1 can (13.5 oz) coconut milk

1 cup chicken broth

2 tbsp olive oil

Salt & pepper to taste

Fresh cilantro & lime wedges for garnish


Instructions

  1. Peel and dice pumpkin. Cut chicken into bite-sized pieces.

  2. Heat olive oil in a large pot; sauté onion until golden.

  3. Add garlic, ginger, curry powder, and pumpkin spice; stir until fragrant.

  4. Brown chicken in the pot for 3–4 minutes.

  5. Add pumpkin and chicken broth; simmer until pumpkin softens.

  6. Pour in coconut milk; cook until sauce thickens.


Garnish with cilantro and lime. Serve hot with rice or naan.

Notes

Substitute chicken with tofu or chickpeas for a vegan version.
Use sugar pumpkins or pie pumpkins for the best flavor.
Adjust curry powder & pumpkin spice to taste.

  • Prep Time: 15 minutes
  • Cook Time: 30 minutes

Nutrition

  • Calories: 380 kcal
  • Fat: 22 g
  • Carbohydrates: 18g
  • Protein: 28 g

FOR MORE RECIPES FOLLOWE ME IN FACEBOOK AND PINTEREST

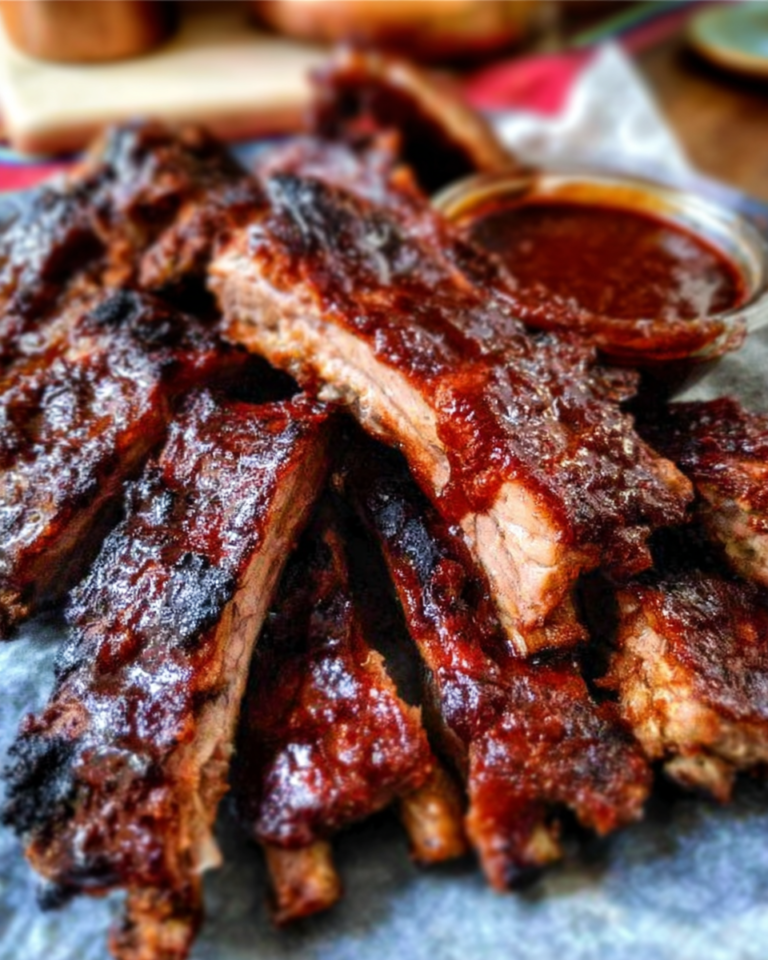
The best crockpot ribs – sticky & tender – always remind me of summers in New York. I was living in Queens when I first discovered how ribs could transform in a slow cooker. On weekends, the smell of smoky barbecue drifted through the air from neighborhood backyards, mixing with the sounds of kids playing stickball on the street. I didn’t own a grill at the time, but I craved that sticky, fall-off-the-bone rib experience. That’s when I learned the secret: crockpot ribs. With just a few spices, a generous slather of barbecue sauce, and plenty of patience, I could get restaurant-quality ribs right in my tiny kitchen.

Fast forward to today—these slow-cooked ribs are still one of my favorite comfort foods. They’re sticky, tender, and always a hit whether I’m cooking for family, friends, or just myself on a Sunday afternoon.

Thanks for being here. I hope these recipes bring warmth to your kitchen and a little joy to your day.

Table of Contents
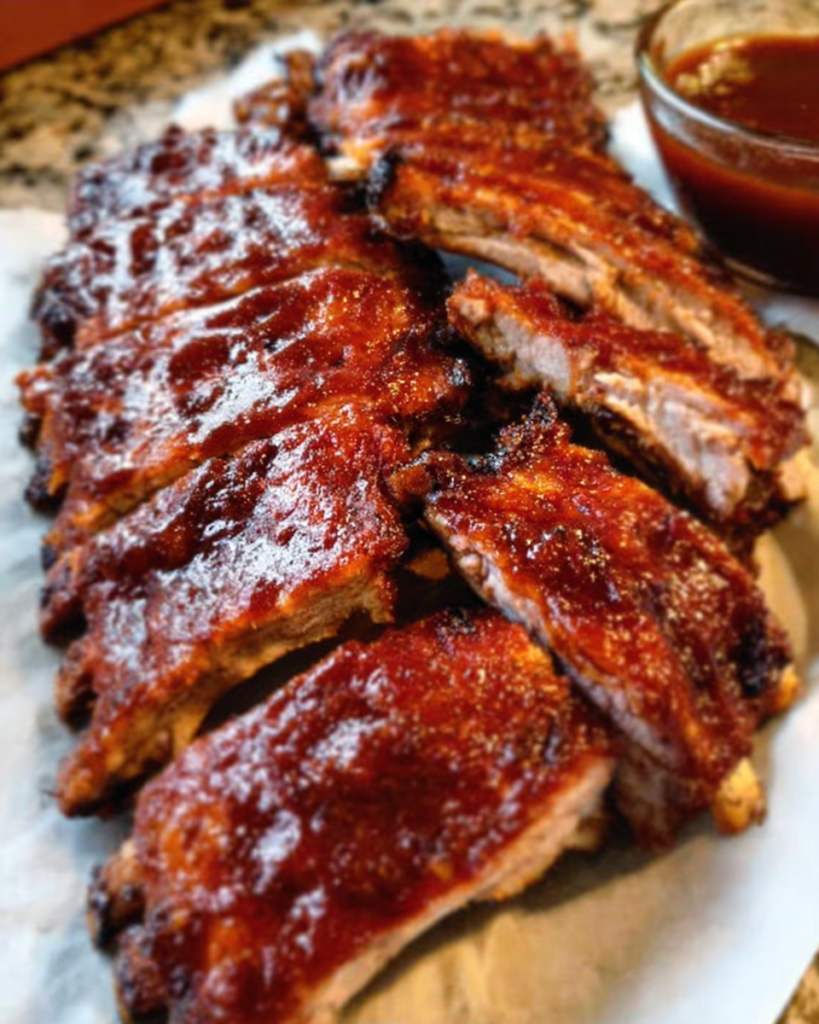
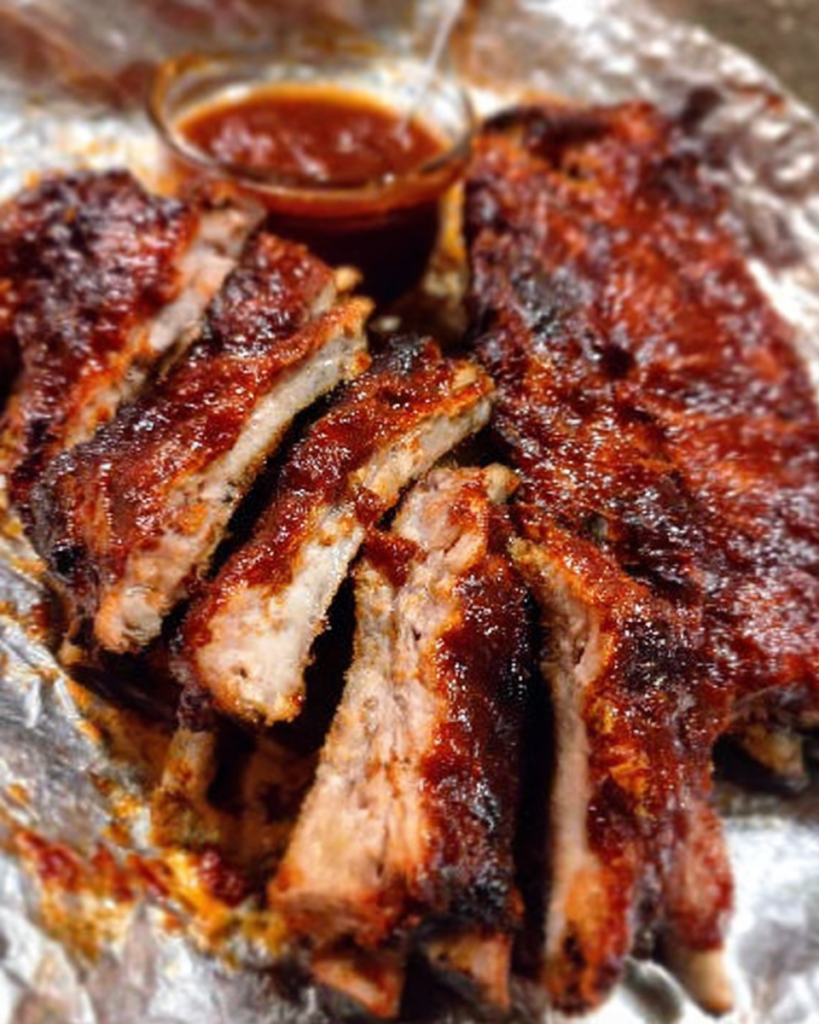
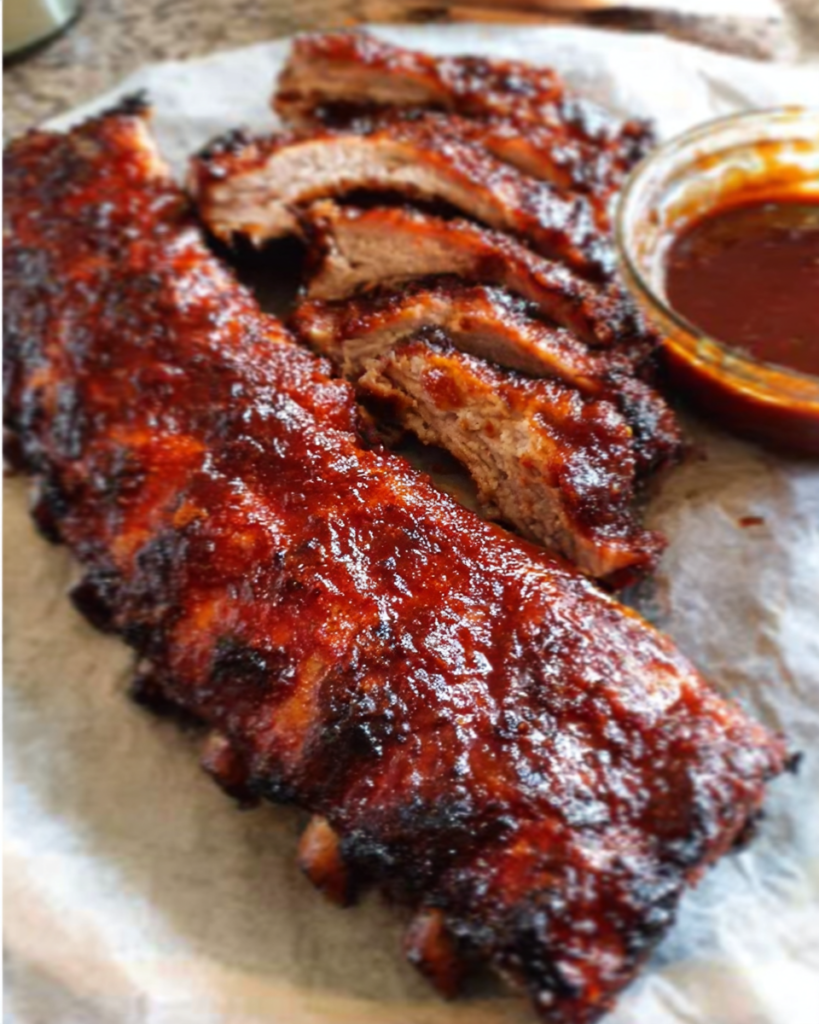
Sticky crockpot ribs glazed with BBQ sauce served on a wooden platter.
Slow-cooked BBQ ribs that are sticky, tender, and full of flavor.

Why Crockpot Ribs Are the Ultimate Comfort Food

A New York Story of Sticky, Tender Ribs

If you’ve ever walked down a New York block on a summer evening, you know how ribs can bring people together. Crockpot ribs capture that same spirit indoors, no matter the season. The low-and-slow method makes ribs perfect for cozy dinners, rainy days, or big family gatherings.

Why Low & Slow Always Wins

Slow cooking breaks down tough connective tissue, leaving ribs juicy and tender. Instead of standing by a grill for hours, your crockpot does the work. Plus, the sealed lid locks in flavor, ensuring every bite is rich and saucy.

Ingredients for the Best Crockpot Ribs Recipe

Essential Ingredients (Meat, Spices, Sauces)

Here’s what you’ll need for the ultimate crockpot ribs:

IngredientAmountNotes
Baby back ribs2 racks (about 4 lbs)Best for tenderness
Brown sugar1/4 cupAdds sweetness
Smoked paprika1 tbspFor smoky depth
Garlic powder1 tspEssential seasoning
Onion powder1 tspBalances flavor
Salt & pepperTo tasteClassic base
BBQ sauce2 cupsUse your favorite brand

Optional Flavor Boosters

  • 1 tbsp mustard (adds tang)
  • 1 tbsp liquid smoke (extra smokiness)
  • 2 tbsp honey (sticky glaze)

Quick Ingredient Substitution Guide

  1. Spare ribs instead of baby back = meatier but needs more time.
  2. Maple syrup can replace honey.
  3. Cayenne pepper for a spicy kick.

Step-by-Step Guide: How to Make Crockpot Ribs Sticky & Tender

Sticky crockpot ribs glazed with BBQ sauce served on a wooden platter.
Slow-cooked BBQ ribs that are sticky, tender, and full of flavor.

Preparing the Ribs (Trimming & Seasoning)

  1. Remove the thin membrane on the back of ribs for better tenderness.
  2. Pat dry with paper towels.
  3. Rub with brown sugar, paprika, garlic powder, onion powder, salt, and pepper.

Slow Cooking Process (Low vs. High Setting)

  • Place ribs in the crockpot, standing them along the sides.
  • Pour BBQ sauce over the ribs.
  • Cook on LOW for 7–8 hours or HIGH for 4–5 hours.

Finishing Touch in the Oven or Grill

For that signature sticky caramelization:

  1. Preheat oven to 450°F (or use grill).
  2. Transfer ribs to a baking sheet.
  3. Brush with extra BBQ sauce.
  4. Bake/grill for 8–10 minutes until bubbly and sticky.

The Secret to Sticky & Tender Ribs Every Time

Choosing Baby Back vs. Spare Ribs

  • Baby back ribs = smaller, tender, quick to cook.
  • Spare ribs = bigger, fattier, deeper flavor but longer cook time.

The Perfect Balance of Sweet, Smoky & Savory

A mix of brown sugar, paprika, and BBQ sauce gives you sticky-sweet ribs, while garlic and onion powder add depth. Adjust heat with cayenne or chipotle.

Sauce Spotlight – BBQ Glaze & Variations

Classic Sweet BBQ Sauce

  • Ketchup, brown sugar, vinegar, Worcestershire.

Spicy Chipotle BBQ Twist

  • Add chipotle peppers in adobo and a splash of hot sauce.

Honey-Garlic Asian-Inspired Glaze

  • Mix soy sauce, honey, garlic, and sesame seeds.

Serving Ideas: What to Eat with Crockpot Ribs

Traditional Sides

  • Coleslaw
  • Mac & cheese
  • Cornbread

Fresh & Light Options

  • Roasted Brussels sprouts
  • Garden salad with vinaigrette
  • Grilled zucchini

Party-Style Serving for Game Day

Cut ribs into individual pieces, pile high on a platter, and serve with extra napkins!

Nutrition Facts & Healthier Adjustments

Sticky crockpot ribs glazed with BBQ sauce served on a wooden platter.
Slow-cooked BBQ ribs that are sticky, tender, and full of flavor.

Standard Nutrition Breakdown (per serving, ~6 oz ribs)

CaloriesProteinFatCarbsSugar
46028g30g18g14g

How to Make Crockpot Ribs a Bit Lighter

  • Use a sugar-free BBQ sauce.
  • Trim visible fat before cooking.
  • Serve with lighter sides like salad.

Tips for Portion Control

Stick to 4–6 ribs per person and fill your plate with veggies.

FAQs About Crockpot Ribs

Why do people cook ribs in a crockpot?

Because it makes them tender and juicy without babysitting a grill.

What goes best with crockpot ribs?

Mac & cheese, coleslaw, cornbread, or roasted veggies.

How long does it take to cook ribs in a slow cooker?

7–8 hours on low or 4–5 on high.

Do you need to sear ribs before crockpot?

Not required, but searing adds extra flavor.

How to thicken rib sauce after slow cooking?

Transfer liquid to a saucepan, simmer until reduced, then brush on ribs.

Conclusion – Sticky, Tender, & Worth Every Bite

Crockpot ribs are the ultimate mix of convenience and indulgence. With minimal prep and a little patience, you’ll have fall-off-the-bone ribs that rival any BBQ joint.

Want more slow-cooked comfort food? Check out our dinner recipes collection.

FORE MORE RECIPES FOLLOWE IN FACEBOOK AND PINTEREST

Print
clock clock iconcutlery cutlery iconflag flag iconfolder folder iconinstagram instagram iconpinterest pinterest iconfacebook facebook iconprint print iconsquares squares iconheart heart iconheart solid heart solid icon
The Best Crockpot Ribs

The Best Crockpot Ribs – Sticky & Tender 🍖


5 Stars 4 Stars 3 Stars 2 Stars 1 Star

No reviews

  • Author: Aleena
  • Total Time: 8 hrs
  • Yield: 6 servings 1x

Description

Make the best crockpot ribs—sticky, tender, and fall-off-the-bone. Easy slow cooker recipe with BBQ sauce and step-by-step guide.


Ingredients

Scale

2 racks baby back ribs (4 lbs)

1/4 cup brown sugar

1 tbsp smoked paprika

1 tsp garlic powder

1 tsp onion powder

Salt & pepper to taste

2 cups BBQ sauce


Instructions

  1. Remove membrane from ribs.
  2. Season with rub (sugar, paprika, garlic, onion, salt, pepper).
  3. Place in crockpot and cover with BBQ sauce.
  4. Cook on LOW 7–8 hrs or HIGH 4–5 hrs.
  5. Finish in oven at 450°F for 8–10 min to caramelize.

Notes

Use baby back ribs for tenderness.
Add honey or liquid smoke for extra flavor.

  • Prep Time: 15 minutes
  • Cook Time: 7–8 hrs (low) / 4–5 hrs (high)
  • Category: Dinner
  • Method: Frying
  • Cuisine: American

Nutrition

  • Calories: 460
  • Sugar: 14 g
  • Fat: 30g
  • Carbohydrates: 18g
  • Protein: 28g
Pin It